


 ### What are Cursor's billing cycles?
Billing cycles run on either a monthly or annual basis, starting on the day you subscribe. For Business accounts with multiple seats, we use prorated billing when your team size changes. This means you only pay for the actual time each seat is used within a billing cycle.
### How do team seats work for Business accounts?
Business accounts use a per-seat billing model where each team member requires one seat license. When adding new members mid-cycle, you're only charged for their remaining time in that billing period. Team admins can manage seats directly through the dashboard.
### Can I switch between monthly and annual billing?
Yes you can! Here's how:
**Pro plan**
1. Go to [settings](https://cursor.com/settings)
2. Click on "Manage subscription" and you will be taken to the billing portal
3. Click on "Update subscription"
4. From here you can switch between monthly and annual billing
5. Select "Yearly" or "Monthly", then click on "Continue"
**Business plan**
1. Go to [settings](https://cursor.com/settings)
2. In the account section, click on "Advanced" then "Upgrade to yearly billing"
### What are Cursor's billing cycles?
Billing cycles run on either a monthly or annual basis, starting on the day you subscribe. For Business accounts with multiple seats, we use prorated billing when your team size changes. This means you only pay for the actual time each seat is used within a billing cycle.
### How do team seats work for Business accounts?
Business accounts use a per-seat billing model where each team member requires one seat license. When adding new members mid-cycle, you're only charged for their remaining time in that billing period. Team admins can manage seats directly through the dashboard.
### Can I switch between monthly and annual billing?
Yes you can! Here's how:
**Pro plan**
1. Go to [settings](https://cursor.com/settings)
2. Click on "Manage subscription" and you will be taken to the billing portal
3. Click on "Update subscription"
4. From here you can switch between monthly and annual billing
5. Select "Yearly" or "Monthly", then click on "Continue"
**Business plan**
1. Go to [settings](https://cursor.com/settings)
2. In the account section, click on "Advanced" then "Upgrade to yearly billing"

 ## Business
Business will have a section for teams.
### Team
Read more about how to manage teams in [members](/account/teams/members)
## Business
Business will have a section for teams.
### Team
Read more about how to manage teams in [members](/account/teams/members)
 ### Metrics
Read more in [team analytics](/account/teams/analytics). This is only available for teams
### Metrics
Read more in [team analytics](/account/teams/analytics). This is only available for teams
 ### Usage based pricing
This is where you can toggle usage based pricing and set spending limits. Read more about [usage based pricing](/account/usage) and how to configure it
### Usage based pricing
This is where you can toggle usage based pricing and set spending limits. Read more about [usage based pricing](/account/usage) and how to configure it
 # Plans
Source: https://docs.cursor.com/account/plans
Compare Cursor pricing plans: Hobby, Pro & Business tiers with feature breakdowns and trial info
# Plans
Source: https://docs.cursor.com/account/plans
Compare Cursor pricing plans: Hobby, Pro & Business tiers with feature breakdowns and trial info
 ### Are requests always routed through the Cursor backend?
Yes! Even if you use your API key, your requests will still go through our backend. That's where we do our final prompt building.
### Does indexing the codebase require storing code?
It does not! If you choose to index your codebase, Cursor will upload your codebase in small chunks to our server to compute embeddings, but all plaintext code ceases to exist after the life of the request.
The embeddings and metadata about your codebase (hashes, obfuscated file names) are stored in our database, but none of your code is.
You can read more about this on our [security page](https://cursor.com/security).
# Security
Source: https://docs.cursor.com/account/security
# Analytics
Source: https://docs.cursor.com/account/teams/analytics
Track team metrics including usage stats, per-user activity, and active user counts from the dashboard
Team admins can track metrics for their team from the [dashboard](/account/dashboard).
The metrics dashboard shows usage statistics for your team over the last 30 days:
### Total Usage
View aggregate metrics across your entire team, including total tabs and premium requests used. For teams less than 30 days old, metrics reflect actual usage since team creation, including activity from team members' individual accounts prior to joining.
### Per Active User
See average usage metrics per active user, including tabs accepted, lines of code, and premium requests.
### User Activity
Track both weekly and monthly active user counts.
## FAQ
#### Invite link
* Click the `Invite Members` button
* Copy the `Invite Link`
* Share with team members
## Usage Controls
Access usage settings to:
* Enable usage-based pricing
* Enable for usage-based for premium models
* Set admin-only modifications for usage-based pricing settings
* Set monthly spending limits
* Monitor team-wide usage
## Billing
When adding new team members:
* Each new member or admin adds a billable seat (see [pricing](https://cursor.com/pricing))
* Seat changes are prorated for your billing period
* Unpaid admin seats are not counted
Adding new team members in the middle of a month, we'll only charge you for the days they actually use. Similarly, if someone leaves the team, we'll credit your account for any unused days.
If you change someone's role (e.g from Admin to Unpaid Admin), we'll automatically adjust the billing from the day of the change. You can choose to be billed either monthly or yearly - both options are available to suit your needs.
### Switching from monthly to yearly billing
You can save 20% of the Business plan by switching from monthly to yearly billing. This can be done from the [dashboard](/account/dashboard)
1. Go to [settings](https://cursor.com/settings)
2. In the account section, click on "Advanced" then "Upgrade to yearly billing"
## Prerequisites
* A Cursor Business plan
* Admin access to your identity provider (e.g., Okta)
* Admin access to your Cursor organization
## Configuration Steps
1. Sign in to your Cursor account and navigate to [cursor.com/settings](http://cursor.com/settings)
2. Locate the "Configure SSO" button in the bottom left of the settings page
3. Click the button to begin the SSO setup process
4. In your identity provider (e.g., Okta):
* Create a new SAML application
* Configure the SAML settings using the information provided in Cursor
* Set up Just-in-Time (JIT) provisioning for seamless user access
### Identity Provider Setup Guides
For detailed setup instructions specific to your identity provider, refer to the [WorkOS integration guides](https://workos.com/docs/integrations).
### Are requests always routed through the Cursor backend?
Yes! Even if you use your API key, your requests will still go through our backend. That's where we do our final prompt building.
### Does indexing the codebase require storing code?
It does not! If you choose to index your codebase, Cursor will upload your codebase in small chunks to our server to compute embeddings, but all plaintext code ceases to exist after the life of the request.
The embeddings and metadata about your codebase (hashes, obfuscated file names) are stored in our database, but none of your code is.
You can read more about this on our [security page](https://cursor.com/security).
# Security
Source: https://docs.cursor.com/account/security
# Analytics
Source: https://docs.cursor.com/account/teams/analytics
Track team metrics including usage stats, per-user activity, and active user counts from the dashboard
Team admins can track metrics for their team from the [dashboard](/account/dashboard).
The metrics dashboard shows usage statistics for your team over the last 30 days:
### Total Usage
View aggregate metrics across your entire team, including total tabs and premium requests used. For teams less than 30 days old, metrics reflect actual usage since team creation, including activity from team members' individual accounts prior to joining.
### Per Active User
See average usage metrics per active user, including tabs accepted, lines of code, and premium requests.
### User Activity
Track both weekly and monthly active user counts.
## FAQ
#### Invite link
* Click the `Invite Members` button
* Copy the `Invite Link`
* Share with team members
## Usage Controls
Access usage settings to:
* Enable usage-based pricing
* Enable for usage-based for premium models
* Set admin-only modifications for usage-based pricing settings
* Set monthly spending limits
* Monitor team-wide usage
## Billing
When adding new team members:
* Each new member or admin adds a billable seat (see [pricing](https://cursor.com/pricing))
* Seat changes are prorated for your billing period
* Unpaid admin seats are not counted
Adding new team members in the middle of a month, we'll only charge you for the days they actually use. Similarly, if someone leaves the team, we'll credit your account for any unused days.
If you change someone's role (e.g from Admin to Unpaid Admin), we'll automatically adjust the billing from the day of the change. You can choose to be billed either monthly or yearly - both options are available to suit your needs.
### Switching from monthly to yearly billing
You can save 20% of the Business plan by switching from monthly to yearly billing. This can be done from the [dashboard](/account/dashboard)
1. Go to [settings](https://cursor.com/settings)
2. In the account section, click on "Advanced" then "Upgrade to yearly billing"
## Prerequisites
* A Cursor Business plan
* Admin access to your identity provider (e.g., Okta)
* Admin access to your Cursor organization
## Configuration Steps
1. Sign in to your Cursor account and navigate to [cursor.com/settings](http://cursor.com/settings)
2. Locate the "Configure SSO" button in the bottom left of the settings page
3. Click the button to begin the SSO setup process
4. In your identity provider (e.g., Okta):
* Create a new SAML application
* Configure the SAML settings using the information provided in Cursor
* Set up Just-in-Time (JIT) provisioning for seamless user access
### Identity Provider Setup Guides
For detailed setup instructions specific to your identity provider, refer to the [WorkOS integration guides](https://workos.com/docs/integrations).
1150 fast requests made with a `premium` (\$46) will be billed 3 times:
1. When first batch of 500 requests has been made (\$20)
2. When second batch of 500 requests has been made (also \$20)
3. Beginning of next month (remaining \$6)
 ## Rules
You can direct the Agent with [rules](/context/rules-for-ai). They can auto attached to any Agent request based on glob patterns, or the Agent can grab one based on the rule description.
Read more about how you can [work with rules](/context/rules-for-ai)
## Use Agent
Start by opening a new Composer and enable Agent mode. From there, you can give it instructions on what work to perform.
## Models
You can use `claude-3.5-sonnet`, `gpt-4o` and `o3-mini` with Agent today. We'll be adding more models soon!
## FAQ
### What's the difference between Agent and Composer?
You can toggle between Normal and Agent mode in Composer. The main difference is that Agent will think harder, use reasoning and tools to solve problems thrown at it. Normal composer doesn't have access to tools, only managing code.
# Notepads
Source: https://docs.cursor.com/beta/notepads
A guide to using Notepads in Cursor for sharing context between Composers and Chat interactions
## Rules
You can direct the Agent with [rules](/context/rules-for-ai). They can auto attached to any Agent request based on glob patterns, or the Agent can grab one based on the rule description.
Read more about how you can [work with rules](/context/rules-for-ai)
## Use Agent
Start by opening a new Composer and enable Agent mode. From there, you can give it instructions on what work to perform.
## Models
You can use `claude-3.5-sonnet`, `gpt-4o` and `o3-mini` with Agent today. We'll be adding more models soon!
## FAQ
### What's the difference between Agent and Composer?
You can toggle between Normal and Agent mode in Composer. The main difference is that Agent will think harder, use reasoning and tools to solve problems thrown at it. Normal composer doesn't have access to tools, only managing code.
# Notepads
Source: https://docs.cursor.com/beta/notepads
A guide to using Notepads in Cursor for sharing context between Composers and Chat interactions
 # Key features
* **Context Sharing**: Seamlessly share context between composers and chat
* **File Attachments**: Attach documentation and reference files (not possible in `.cursorrules`)
* **Dynamic References**: Use `@` mentions to link to other resources
* **Flexible Content**: Write and structure information in a way that suits your needs
# Common use cases
1. **Dynamic Boilerplate Generation**
* Create templates for common code patterns
* Store project-specific scaffolding rules
* Maintain consistent code structure across your team
2. **Architecture Documentation**
* Frontend specifications
* Backend design patterns
* Data model documentation
* System architecture guidelines
3. **Development Guidelines**
* Coding standards
* Project-specific rules
* Best practices
* Team conventions
## FAQ
### What should I write in Notepads?
Notepads are ideal for:
* Project architecture decisions
* Development guidelines and standards
* Reusable code templates
* Documentation that needs to be referenced frequently
* Team-specific conventions and rules
### What should not be written in Notepads?
Avoid using Notepads for:
* Temporary notes or scratch work
* Information that belongs in version control (like git)
* Sensitive data or credentials
* Highly volatile information that changes frequently
### Should I follow a particular format or structure?
While Notepads are flexible, we recommend:
* Using clear headings and sections
* Including examples where relevant
* Keeping content focused and organized
* Using markdown formatting for better readability
* Adding relevant file attachments when necessary
### Example Notepad
Here's a typical example of a Notepad for a web application project:
```md Notepad example
# API Development Guidelines
## Endpoint Structure
- Use RESTful conventions
- Base URL: `/api/v1`
- Resource naming in plural form
## Authentication
- JWT-based authentication
- Token format: Bearer {token}
- Refresh token mechanism required
## Response Format
{
"status": "success|error",
"data": {},
"message": "Optional message"
}
## Attached References
@api-specs.yaml
@auth-flow.md
```
# Apply
Source: https://docs.cursor.com/chat/apply
Learn how to apply, accept, or reject code suggestions from chat using Cursor's Apply feature
Cursor's `Apply` allows you to quickly integrate a codeblock suggestion from the chat into your code.
## Apply Code Blocks
To apply a code block suggestion, you can press on the play button in the top right corner of each chat code block.
# Key features
* **Context Sharing**: Seamlessly share context between composers and chat
* **File Attachments**: Attach documentation and reference files (not possible in `.cursorrules`)
* **Dynamic References**: Use `@` mentions to link to other resources
* **Flexible Content**: Write and structure information in a way that suits your needs
# Common use cases
1. **Dynamic Boilerplate Generation**
* Create templates for common code patterns
* Store project-specific scaffolding rules
* Maintain consistent code structure across your team
2. **Architecture Documentation**
* Frontend specifications
* Backend design patterns
* Data model documentation
* System architecture guidelines
3. **Development Guidelines**
* Coding standards
* Project-specific rules
* Best practices
* Team conventions
## FAQ
### What should I write in Notepads?
Notepads are ideal for:
* Project architecture decisions
* Development guidelines and standards
* Reusable code templates
* Documentation that needs to be referenced frequently
* Team-specific conventions and rules
### What should not be written in Notepads?
Avoid using Notepads for:
* Temporary notes or scratch work
* Information that belongs in version control (like git)
* Sensitive data or credentials
* Highly volatile information that changes frequently
### Should I follow a particular format or structure?
While Notepads are flexible, we recommend:
* Using clear headings and sections
* Including examples where relevant
* Keeping content focused and organized
* Using markdown formatting for better readability
* Adding relevant file attachments when necessary
### Example Notepad
Here's a typical example of a Notepad for a web application project:
```md Notepad example
# API Development Guidelines
## Endpoint Structure
- Use RESTful conventions
- Base URL: `/api/v1`
- Resource naming in plural form
## Authentication
- JWT-based authentication
- Token format: Bearer {token}
- Refresh token mechanism required
## Response Format
{
"status": "success|error",
"data": {},
"message": "Optional message"
}
## Attached References
@api-specs.yaml
@auth-flow.md
```
# Apply
Source: https://docs.cursor.com/chat/apply
Learn how to apply, accept, or reject code suggestions from chat using Cursor's Apply feature
Cursor's `Apply` allows you to quickly integrate a codeblock suggestion from the chat into your code.
## Apply Code Blocks
To apply a code block suggestion, you can press on the play button in the top right corner of each chat code block.
 This will edit your file to incorporate the code produced by Chat. Since you can add the most context and have the most back-and-forth with the model in Chat,
we recommend Chat + Apply for more complex AI-driven code changes.
## Accept or Reject
Once you have applied a code block, you can go through the diffs and accept or reject the changes. You can also click
on the "Accept" or "Reject" buttons in the top right corner of the chat code block.
`Ctrl/⌘ Enter` to accept, `Ctrl/⌘ Backspace` to reject.
This will edit your file to incorporate the code produced by Chat. Since you can add the most context and have the most back-and-forth with the model in Chat,
we recommend Chat + Apply for more complex AI-driven code changes.
## Accept or Reject
Once you have applied a code block, you can go through the diffs and accept or reject the changes. You can also click
on the "Accept" or "Reject" buttons in the top right corner of the chat code block.
`Ctrl/⌘ Enter` to accept, `Ctrl/⌘ Backspace` to reject.
 # With Codebase
Source: https://docs.cursor.com/chat/codebase
Learn how Chat searches codebases using default search, embeddings, and advanced @Codebase queries.
## Default Codebase Chat
If a codebase isn't [indexed](/context/codebase-indexing), Chat will first attempt to compute a few search queries to
be used to search across your codebase. For better accuracy, it's recommended to use [embeddings search](#embeddings-search).
# With Codebase
Source: https://docs.cursor.com/chat/codebase
Learn how Chat searches codebases using default search, embeddings, and advanced @Codebase queries.
## Default Codebase Chat
If a codebase isn't [indexed](/context/codebase-indexing), Chat will first attempt to compute a few search queries to
be used to search across your codebase. For better accuracy, it's recommended to use [embeddings search](#embeddings-search).
 ## Embeddings Search
With [codebase indexing](/context/codebase-indexing), Chat can accurately generate responses based on your codebase.
By pressing `Ctrl/⌘ + Enter` after typing a message, Chat scans through your indexed codebase to find pieces of relevant code. This is generally
good for quickly including code snippets to be taken into the context of the conversation. For more control over the codebase search and better accuracy,
you can use `@codebase`.
## Embeddings Search
With [codebase indexing](/context/codebase-indexing), Chat can accurately generate responses based on your codebase.
By pressing `Ctrl/⌘ + Enter` after typing a message, Chat scans through your indexed codebase to find pieces of relevant code. This is generally
good for quickly including code snippets to be taken into the context of the conversation. For more control over the codebase search and better accuracy,
you can use `@codebase`.
 ## Advanced Codebase Search
Cursor codebase chat goes through a more detailed search when `@Codebase` is used.
See more about `@Codebase` [here](/context/@-symbols/@-codebase).
# Customize
Source: https://docs.cursor.com/chat/customize
Learn how to open Chat as an editor tab and use keyboard shortcuts to access it quickly
## In-Editor
Chat can also be used as an editor tab by clicking on the horizontal "More" button, and then clicking on the "Open Chat in Editor" button.
Chat will then behave as a regular editor tab. Pressing `Ctrl/⌘ + L` will bring up the chat tab and focus onto it.
# Overview
Source: https://docs.cursor.com/chat/overview
Chat feature that uses AI to answer code questions with smart context and file references in your editor
Chat lets you ask questions or solve problems in your codebase with the most capable language models, all in your editor.
## Advanced Codebase Search
Cursor codebase chat goes through a more detailed search when `@Codebase` is used.
See more about `@Codebase` [here](/context/@-symbols/@-codebase).
# Customize
Source: https://docs.cursor.com/chat/customize
Learn how to open Chat as an editor tab and use keyboard shortcuts to access it quickly
## In-Editor
Chat can also be used as an editor tab by clicking on the horizontal "More" button, and then clicking on the "Open Chat in Editor" button.
Chat will then behave as a regular editor tab. Pressing `Ctrl/⌘ + L` will bring up the chat tab and focus onto it.
# Overview
Source: https://docs.cursor.com/chat/overview
Chat feature that uses AI to answer code questions with smart context and file references in your editor
Chat lets you ask questions or solve problems in your codebase with the most capable language models, all in your editor.
 For language models to give good answers, they need to know specific things that are relevant to your codebase -- context.
Cursor has several built-in features to provide context in chat, such as automatically including context across your entire codebase, searching the web, indexing documentation, and user-specified references to code blocks. These features are built to eliminate the tedious copy-pasting otherwise necessary for working with language models on code.
By default, Chat is in the AI pane, which is on the opposite side of your primary sidebar. You can toggle the AI pane by pressing `Ctrl/⌘ + L`, which focuses onto the chat when opened.
To submit your query, press `Enter`.
## User and AI Messages
User messages contain the text you type, along with the context you've referenced. You can go back to any previous user messages to edit and rerun your queries. This will
overwrite any messages after that and regenerate new ones.
AI messages are the responses generated from the AI model you've picked. They are paired with the user message before them. AI messages may contain parsed code blocks which can be added to your codebase with [instant apply](/chat/apply).
All user/AI messages together in the same thread are called a chat thread, and each chat thread is saved in your chat history.
## Chat History
By pressing the "Previous Chats" button on the top right of the AI pane, or by pressing `Ctrl/⌘ + Alt/Option + L`, you can see the chat history. You can click on any chat thread to go back and see the messages that make up that thread,
and you can also modify the title of the thread by clicking the pen icon, or delete the thread by clicking the garbage can icon upon hovering over the thread in the history.
The title of a Cursor thread is just the first few words of the first user message.
## Default Context
By default, Chat includes the current file as context. You can submit a query without including any context by removing the current file pill from the message.
As you type, you can see what will be included in context in the pills above the input box.
## Adding Context
By default, user messages will contain the text you type, along with the context you've referenced. You can add more custom context to each bubble with @ symbols, and by default, the current viewing file will be used as context as well in the user message.
See the [@ symbols](/context/@-symbols/@-files) pages for more information.
## AI Fix in Chat
A convenient feature to fix linter errors in your codebase is to use the AI fix in chat. To do this, hover over the error in the editor, and click the blue AI fix button that shows up.
The keyboard shortcut for this would be to do `Ctrl/⌘ + Shift + E`.
For language models to give good answers, they need to know specific things that are relevant to your codebase -- context.
Cursor has several built-in features to provide context in chat, such as automatically including context across your entire codebase, searching the web, indexing documentation, and user-specified references to code blocks. These features are built to eliminate the tedious copy-pasting otherwise necessary for working with language models on code.
By default, Chat is in the AI pane, which is on the opposite side of your primary sidebar. You can toggle the AI pane by pressing `Ctrl/⌘ + L`, which focuses onto the chat when opened.
To submit your query, press `Enter`.
## User and AI Messages
User messages contain the text you type, along with the context you've referenced. You can go back to any previous user messages to edit and rerun your queries. This will
overwrite any messages after that and regenerate new ones.
AI messages are the responses generated from the AI model you've picked. They are paired with the user message before them. AI messages may contain parsed code blocks which can be added to your codebase with [instant apply](/chat/apply).
All user/AI messages together in the same thread are called a chat thread, and each chat thread is saved in your chat history.
## Chat History
By pressing the "Previous Chats" button on the top right of the AI pane, or by pressing `Ctrl/⌘ + Alt/Option + L`, you can see the chat history. You can click on any chat thread to go back and see the messages that make up that thread,
and you can also modify the title of the thread by clicking the pen icon, or delete the thread by clicking the garbage can icon upon hovering over the thread in the history.
The title of a Cursor thread is just the first few words of the first user message.
## Default Context
By default, Chat includes the current file as context. You can submit a query without including any context by removing the current file pill from the message.
As you type, you can see what will be included in context in the pills above the input box.
## Adding Context
By default, user messages will contain the text you type, along with the context you've referenced. You can add more custom context to each bubble with @ symbols, and by default, the current viewing file will be used as context as well in the user message.
See the [@ symbols](/context/@-symbols/@-files) pages for more information.
## AI Fix in Chat
A convenient feature to fix linter errors in your codebase is to use the AI fix in chat. To do this, hover over the error in the editor, and click the blue AI fix button that shows up.
The keyboard shortcut for this would be to do `Ctrl/⌘ + Shift + E`.
 # Overview
Source: https://docs.cursor.com/cmdk/overview
Learn how to use Cmd/Ctrl K in Cursor to generate, edit code and ask questions with the Prompt Bar
Cmd K, also known or "Ctrl K" on Windows/Linux, allows you to generate new code or edit existing code in the editor window.
# Overview
Source: https://docs.cursor.com/cmdk/overview
Learn how to use Cmd/Ctrl K in Cursor to generate, edit code and ask questions with the Prompt Bar
Cmd K, also known or "Ctrl K" on Windows/Linux, allows you to generate new code or edit existing code in the editor window.
 ## Prompt Bars
In Cursor, we call the bar that appears when you press `Ctrl/Cmd K` the "Prompt Bar". It works similarly to the AI input box for chat, in
which you can type normally, or use [@ symbols](context/@-symbols) to reference other context.
## Inline Generation
If no code is selected when you press `Ctrl/Cmd K`, Cursor will generate new code based on the prompt you type in the prompt bar.
## Prompt Bars
In Cursor, we call the bar that appears when you press `Ctrl/Cmd K` the "Prompt Bar". It works similarly to the AI input box for chat, in
which you can type normally, or use [@ symbols](context/@-symbols) to reference other context.
## Inline Generation
If no code is selected when you press `Ctrl/Cmd K`, Cursor will generate new code based on the prompt you type in the prompt bar.
 ## Inline Edits
For in-place edits, you can simply select the code you want to edit and type into the prompt bar.
## Inline Edits
For in-place edits, you can simply select the code you want to edit and type into the prompt bar.
 ## Follow-up Instructions
After each generation, you can further refine the prompt by adding more instructions to the prompt bar, and pressing `Enter` so the AI regenerates based on your follow-up instructions.
## Default Context
By default, Cursor will try to find different kinds of useful information to improve code generation, in addition to the manual [@ symbols](/context/@-symbols/@-files) you include.
Additional context may include related files, recently viewed files, and more. After gathering, Cursor ranks the context items by relevance to your edit/generation
and keeps the top items in context for the large language model.
## Quick Question
If you press `Option/Alt Enter` while in the prompt bar, Cursor will respond to any questions you have about the selection, and the context you have attached.
The contents of this conversation could be further used in follow-up generations, so you could simply type "do it" after Cursor comes up with a response to generate the code after a quick question.
# Terminal Cmd K
Source: https://docs.cursor.com/cmdk/terminal-cmdk
Use Ctrl/⌘ K in Cursor terminal to generate and run commands through a prompt bar interface
In the built-in Cursor terminal, you can press `Ctrl/⌘ K` to open a prompt bar on the bottom of the terminal.
This prompt bar allows you to describe your desired action in the terminal, and terminal Cmd K will generate a command.
You can accept the command by hitting `esc` or run the command immediately with `Ctrl/⌘ + Enter`.
## Follow-up Instructions
After each generation, you can further refine the prompt by adding more instructions to the prompt bar, and pressing `Enter` so the AI regenerates based on your follow-up instructions.
## Default Context
By default, Cursor will try to find different kinds of useful information to improve code generation, in addition to the manual [@ symbols](/context/@-symbols/@-files) you include.
Additional context may include related files, recently viewed files, and more. After gathering, Cursor ranks the context items by relevance to your edit/generation
and keeps the top items in context for the large language model.
## Quick Question
If you press `Option/Alt Enter` while in the prompt bar, Cursor will respond to any questions you have about the selection, and the context you have attached.
The contents of this conversation could be further used in follow-up generations, so you could simply type "do it" after Cursor comes up with a response to generate the code after a quick question.
# Terminal Cmd K
Source: https://docs.cursor.com/cmdk/terminal-cmdk
Use Ctrl/⌘ K in Cursor terminal to generate and run commands through a prompt bar interface
In the built-in Cursor terminal, you can press `Ctrl/⌘ K` to open a prompt bar on the bottom of the terminal.
This prompt bar allows you to describe your desired action in the terminal, and terminal Cmd K will generate a command.
You can accept the command by hitting `esc` or run the command immediately with `Ctrl/⌘ + Enter`.
 By default, Terminal Cmd K sees your recent terminal history, your instructions, and anything else you put in the prompt bar as context.
# Composer
Source: https://docs.cursor.com/composer
AI coding assistant that helps write and edit code directly in your editor with chat and agent modes
Composer is your AI coding assistant that lives in your editor. It helps you explore code, write new features, and modify existing code without leaving your workflow. Use `⌘I` to open it, and `⌘N` to create a new Composer.
By default, Terminal Cmd K sees your recent terminal history, your instructions, and anything else you put in the prompt bar as context.
# Composer
Source: https://docs.cursor.com/composer
AI coding assistant that helps write and edit code directly in your editor with chat and agent modes
Composer is your AI coding assistant that lives in your editor. It helps you explore code, write new features, and modify existing code without leaving your workflow. Use `⌘I` to open it, and `⌘N` to create a new Composer.
 ## Modes
Composer can be used in two different modes
## Modes
Composer can be used in two different modes
 ## Generating & Applying Changes
When Composer suggests changes:
* Review them in the diff view
* Accept or reject changes with the buttons provided
* Use checkpoints to undo if needed
## Checkpoints
For every iteration a checkpoint is created. You can return to any previous version by clicking on `checkout` near that checkpoint. This is handy if you don't like the current changes and want to revert to an earlier state.
## Generating & Applying Changes
When Composer suggests changes:
* Review them in the diff view
* Accept or reject changes with the buttons provided
* Use checkpoints to undo if needed
## Checkpoints
For every iteration a checkpoint is created. You can return to any previous version by clicking on `checkout` near that checkpoint. This is handy if you don't like the current changes and want to revert to an earlier state.
 ## History
Access previous Composer sessions and chats through the history. Open it from the history icon to the right of Cursor Tab. You'll see a list of past composers and chats, which you can revisit, rename, or remove.
Open with `⌘+⌥+L` or `Ctrl+Alt+L` when Composer is focused.
## History
Access previous Composer sessions and chats through the history. Open it from the history icon to the right of Cursor Tab. You'll see a list of past composers and chats, which you can revisit, rename, or remove.
Open with `⌘+⌥+L` or `Ctrl+Alt+L` when Composer is focused.
 ## Layout
* **Pane**: A sidebar with chat on the left and your code editor on the right.
* **Editor**: A single editor window, similar to viewing code normally. You can move it around, split it, or even place it in a separate window.
* **Floating**: A draggable window that you can position where you like
You can change this from the Composer menu > Open as \[layout]
## Iterate on lints
Composer attempts to fix linting issues in generated code for most programming languages. If Composer detects lint errors, it will try to fix them automatically when this feature is enabled. Currently, only one iteration is supported.
## Layout
* **Pane**: A sidebar with chat on the left and your code editor on the right.
* **Editor**: A single editor window, similar to viewing code normally. You can move it around, split it, or even place it in a separate window.
* **Floating**: A draggable window that you can position where you like
You can change this from the Composer menu > Open as \[layout]
## Iterate on lints
Composer attempts to fix linting issues in generated code for most programming languages. If Composer detects lint errors, it will try to fix them automatically when this feature is enabled. Currently, only one iteration is supported.

 ## From the Editor
Another way to add code snippets as context is to select the code you want to reference, and click on either "Add to Chat" (`Ctrl/⌘ Shift L`) or "Add to Edit" (`Ctrl/⌘ Shift K`).
These will add the selected code snippet to either the Chat input box or the currently active Cmd K prompt bar.
## From the Editor
Another way to add code snippets as context is to select the code you want to reference, and click on either "Add to Chat" (`Ctrl/⌘ Shift L`) or "Add to Edit" (`Ctrl/⌘ Shift K`).
These will add the selected code snippet to either the Chat input box or the currently active Cmd K prompt bar.
 To add a selected code to a new chat, you can press `Ctrl/⌘ L`.
# @Codebase
Source: https://docs.cursor.com/context/@-symbols/@-codebase
Learn how Chat processes codebase queries using gathering, reranking, reasoning, and generation steps
To add a selected code to a new chat, you can press `Ctrl/⌘ L`.
# @Codebase
Source: https://docs.cursor.com/context/@-symbols/@-codebase
Learn how Chat processes codebase queries using gathering, reranking, reasoning, and generation steps
 Through `@Codebase`, Chat goes through these steps until it finds the most important pieces of code to use.
* Gathering: scanning through your codebase for important files / code chunks
* Reranking: reordering the context items based on relevancy to the query
* Reasoning: thinking through a plan of using the context
* Generating: coming up with a response
Another way of submitting an advanced codebase query is to click on the dropdown next to the `Ctrl/⌘ + Enter` button and select `reranker` for the search behavior.
This is only available when `@Codebase` isn't used, otherwise `@Codebase` takes precedence.
Through `@Codebase`, Chat goes through these steps until it finds the most important pieces of code to use.
* Gathering: scanning through your codebase for important files / code chunks
* Reranking: reordering the context items based on relevancy to the query
* Reasoning: thinking through a plan of using the context
* Generating: coming up with a response
Another way of submitting an advanced codebase query is to click on the dropdown next to the `Ctrl/⌘ + Enter` button and select `reranker` for the search behavior.
This is only available when `@Codebase` isn't used, otherwise `@Codebase` takes precedence.
 # @Cursor Rules
Source: https://docs.cursor.com/context/@-symbols/@-cursor-rules
Work with and reference Cursor rules in your project
The `@Cursor Rules` symbol provides access to [project rules](/context/rules-for-ai#project-rules-recommended) and guidelines you've set up for your project, allowing you to explicitly apply them to your context.
# @Cursor Rules
Source: https://docs.cursor.com/context/@-symbols/@-cursor-rules
Work with and reference Cursor rules in your project
The `@Cursor Rules` symbol provides access to [project rules](/context/rules-for-ai#project-rules-recommended) and guidelines you've set up for your project, allowing you to explicitly apply them to your context.
 # @Definitions
Source: https://docs.cursor.com/context/@-symbols/@-definitions
Add nearby code definitions to Cmd K context using the @Definitions symbol
# @Definitions
Source: https://docs.cursor.com/context/@-symbols/@-definitions
Add nearby code definitions to Cmd K context using the @Definitions symbol
 # @Docs
Source: https://docs.cursor.com/context/@-symbols/@-docs
Learn how to use, add, and manage custom documentation as context in Cursor using @Docs
# @Docs
Source: https://docs.cursor.com/context/@-symbols/@-docs
Learn how to use, add, and manage custom documentation as context in Cursor using @Docs
 Cursor comes with a set of third party docs crawled, indexed, and ready to be used as context. You can access them by using the `@Docs` symbol. You can find a list of our default pre-scraped docs [here](https://raw.githubusercontent.com/getcursor/crawler/main/docs.jsonl).
## Add Custom Docs
If you want to crawl and index custom docs that are not already provided, you can do so by `@Docs` > `Add new doc`.
The following modal will appear after you've pasted in the URL of your desired doc:
Cursor comes with a set of third party docs crawled, indexed, and ready to be used as context. You can access them by using the `@Docs` symbol. You can find a list of our default pre-scraped docs [here](https://raw.githubusercontent.com/getcursor/crawler/main/docs.jsonl).
## Add Custom Docs
If you want to crawl and index custom docs that are not already provided, you can do so by `@Docs` > `Add new doc`.
The following modal will appear after you've pasted in the URL of your desired doc:
 Cursor will then index and learn the doc, and you will be able to use it as context like any other doc. Make sure to add a trailing slash to the URL if you want to index all subpages and subdirectories
 ## Manage Custom Docs
Under `Cursor Settings` > `Features` > `Docs`, you will see the docs you have added.
You can edit, delete, or add new docs here.
## Manage Custom Docs
Under `Cursor Settings` > `Features` > `Docs`, you will see the docs you have added.
You can edit, delete, or add new docs here.
 # @Files
Source: https://docs.cursor.com/context/@-symbols/@-files
Learn how to reference files using @ in Cursor's Chat and Cmd K, with preview and chunking features
In AI input boxes such as in Chat and Cmd K, you can reference entire files by using `@Files`.
Also, if you continue to type after `@`, you will see your file search results after the [`@Code`](/context/@-symbols/@-code) strategy.
In order to make sure the file you're referencing is the correct file, Cursor will show a preview of the file's path. This is especially useful when you have multiple files with the same name in different folders.
# @Files
Source: https://docs.cursor.com/context/@-symbols/@-files
Learn how to reference files using @ in Cursor's Chat and Cmd K, with preview and chunking features
In AI input boxes such as in Chat and Cmd K, you can reference entire files by using `@Files`.
Also, if you continue to type after `@`, you will see your file search results after the [`@Code`](/context/@-symbols/@-code) strategy.
In order to make sure the file you're referencing is the correct file, Cursor will show a preview of the file's path. This is especially useful when you have multiple files with the same name in different folders.
 ### Chat Long File References
In Cursor's Chat, if the contents of a file is too long, Cursor will chunk the file into smaller chunks and rerank them based on relevance to the query.
### Chat Long File References
In Cursor's Chat, if the contents of a file is too long, Cursor will chunk the file into smaller chunks and rerank them based on relevance to the query.
 {/*
commenting this out, not in product anymore afaik // ez 2025-02-09
### Cmd K Chunking Strategy
For Cmd K, Cursor uses the file references differently based on the content length as well.
- auto
- Automatically pick one of the three reading strategies based on the file size
- full file
- The entire file is used as context.
- outline
- Cursor parses the outline of the file and uses the information as context.
- chunks
- Cursor chunks the file into smaller chunks and picks the most relevant one.
{/*
commenting this out, not in product anymore afaik // ez 2025-02-09
### Cmd K Chunking Strategy
For Cmd K, Cursor uses the file references differently based on the content length as well.
- auto
- Automatically pick one of the three reading strategies based on the file size
- full file
- The entire file is used as context.
- outline
- Cursor parses the outline of the file and uses the information as context.
- chunks
- Cursor chunks the file into smaller chunks and picks the most relevant one.
 */}
### Drag and Drop
You can drag and drop files from the primary sidebar into Composer, Chat or Cmd K to add them as context.
# @Folders
Source: https://docs.cursor.com/context/@-symbols/@-folders
Reference folders as context in Chat & Composer for enhanced AI conversations
You can reference entire folders in Cursor as context. When using `@Folders` with Agent, it attaches a list of all items in the directory, which allows the Agent to search through the contents itself. This gives Agent the ability to explore and analyze the folder's contents independently as needed for the task at hand.
*/}
### Drag and Drop
You can drag and drop files from the primary sidebar into Composer, Chat or Cmd K to add them as context.
# @Folders
Source: https://docs.cursor.com/context/@-symbols/@-folders
Reference folders as context in Chat & Composer for enhanced AI conversations
You can reference entire folders in Cursor as context. When using `@Folders` with Agent, it attaches a list of all items in the directory, which allows the Agent to search through the contents itself. This gives Agent the ability to explore and analyze the folder's contents independently as needed for the task at hand.
 # @Git
Source: https://docs.cursor.com/context/@-symbols/@-git
Learn how to use @Git in Cursor's Chat to analyze diffs, find bugs, and generate commit messages
# @Git
Source: https://docs.cursor.com/context/@-symbols/@-git
Learn how to use @Git in Cursor's Chat to analyze diffs, find bugs, and generate commit messages
 ## Common Use Cases
One common use case for `@Git` is to allow Cursor's AI to scan the diff and look for bugs or issues that could be caused by the diff.
## Common Use Cases
One common use case for `@Git` is to allow Cursor's AI to scan the diff and look for bugs or issues that could be caused by the diff.
 You could also use `@Diff of Working State` to generate a commit message from your current diffs.
 # @Link
Source: https://docs.cursor.com/context/@-symbols/@-link
Use web content as context by linking to external websites and resources
## Paste Links
In order for Cursor to visit a link before paste the link and you'll see that the link is "tagged"
# @Link
Source: https://docs.cursor.com/context/@-symbols/@-link
Use web content as context by linking to external websites and resources
## Paste Links
In order for Cursor to visit a link before paste the link and you'll see that the link is "tagged"
 ## Remove Links
By default, we automatically parse links and turn them into `@Links` in Chat.
If you prefer to have the link as plain text, click on the link and then click `Unlink`.
You can also paste without formatting (hold `Shift`) to make sure the link is not tagged
## Remove Links
By default, we automatically parse links and turn them into `@Links` in Chat.
If you prefer to have the link as plain text, click on the link and then click `Unlink`.
You can also paste without formatting (hold `Shift`) to make sure the link is not tagged
 # @Lint Errors
Source: https://docs.cursor.com/context/@-symbols/@-lint-errors
Access and reference linting errors in your codebase
The `@Lint Errors` symbol automatically captures and provides context about any linting errors and warnings from your currently active file.
[Composer](/composer) and [Agent](/agent) can see lint errors by default
# @Lint Errors
Source: https://docs.cursor.com/context/@-symbols/@-lint-errors
Access and reference linting errors in your codebase
The `@Lint Errors` symbol automatically captures and provides context about any linting errors and warnings from your currently active file.
[Composer](/composer) and [Agent](/agent) can see lint errors by default
 # @Notepads
Source: https://docs.cursor.com/context/@-symbols/@-notepads
Reference and include notepads as context in Cursor
The `@Notepads` symbol allows you to reference and include your [Notepads](/beta/notepads) as context in your conversations. Notepads are powerful context-sharing tools that bridge the gap between composers and chat interactions, allowing you to create reusable contexts for your development workflow.
# @Notepads
Source: https://docs.cursor.com/context/@-symbols/@-notepads
Reference and include notepads as context in Cursor
The `@Notepads` symbol allows you to reference and include your [Notepads](/beta/notepads) as context in your conversations. Notepads are powerful context-sharing tools that bridge the gap between composers and chat interactions, allowing you to create reusable contexts for your development workflow.
 # @Recent Changes
Source: https://docs.cursor.com/context/@-symbols/@-recent-changes
Access and reference recent changes in your workspace
Cursor automatically keeps track of recent changes made to your codebase. The `@Recent Changes` symbol allows you to pass these modifications as context
# @Recent Changes
Source: https://docs.cursor.com/context/@-symbols/@-recent-changes
Access and reference recent changes in your workspace
Cursor automatically keeps track of recent changes made to your codebase. The `@Recent Changes` symbol allows you to pass these modifications as context
 # @Summarized Composers
Source: https://docs.cursor.com/context/@-symbols/@-summarized-composers
Reference summarized versions of your previous Composer sessions as context in new conversations
When working on complex tasks in [Composer](/composer), you might want to reference context or decisions from previous conversations. The `@Summarized Composers` symbol allows you to include summarized versions of your previous Composer sessions as context.
This is particularly useful when:
* You have a long Composer session with important context you want to reference
* You're starting a new but related task and want to maintain continuity
* You want to share the reasoning or decisions from a previous session
# @Summarized Composers
Source: https://docs.cursor.com/context/@-symbols/@-summarized-composers
Reference summarized versions of your previous Composer sessions as context in new conversations
When working on complex tasks in [Composer](/composer), you might want to reference context or decisions from previous conversations. The `@Summarized Composers` symbol allows you to include summarized versions of your previous Composer sessions as context.
This is particularly useful when:
* You have a long Composer session with important context you want to reference
* You're starting a new but related task and want to maintain continuity
* You want to share the reasoning or decisions from a previous session
 # @Web
Source: https://docs.cursor.com/context/@-symbols/@-web
@Web command searches the internet automatically to find relevant context for Cursor queries
## `@Web`
# @Web
Source: https://docs.cursor.com/context/@-symbols/@-web
@Web command searches the internet automatically to find relevant context for Cursor queries
## `@Web`
 With `@Web`, Cursor constructs a search query based on the query and the context you've provided, and searches the web to
find relevant information as additional context.
This can be useful to allow Cursor to find the most up-to-date information online, or to allow Cursor to scrape multiple websites in a few seconds to find the best answer, without the user having to manually search anywhere.
# Overview
Source: https://docs.cursor.com/context/@-symbols/overview
Overview of all @ symbols available in Cursor for context and commands
In Cursors input boxes, such as in Composer, Chat and Cmd K, you can use @ symbols by typing `@`. A popup menu will appear with a list of suggestions,
and it will automatically filter to only show the most relevant suggestions based on your input.
## Keyboard Shortcuts
You can navigate through the list of suggestions using the up/down arrow keys. You can hit `Enter` to select a suggestion. If the suggestion is a category, such as `Files`,
the suggestions will be filtered to only show the most relevant items within that category.
Here's the list of all @ symbols available:
* [@Files](/context/@-symbols/@-files) - Reference specific files in your project
* [@Folders](/context/@-symbols/@-folders) - Reference entire folders for broader context
* [@Code](/context/@-symbols/@-code) - Reference specific code snippets or symbols from your codebase
* [@Docs](/context/@-symbols/@-docs) - Access documentation and guides
* [@Git](/context/@-symbols/@-git) - Access git history and changes
* [@Notepads](/context/@-symbols/@-notepads) - Access notepads
* [@Summarized Composers](/context/@-symbols/@-summarized-composers) - Work with summarized composer sessions
* [@Cursor Rules](/context/@-symbols/@-cursor-rules) - Work with cursor rules
* [@Web](/context/@-symbols/@-web) - Reference external web resources and documentation
* [@Link (paste)](/context/@-symbols/@-link) - Create links to specific code or documentation
* [@Recent Changes](/context/@-symbols/@-recent-changes) - Create links to specific code or documentation
* [@Codebase](/context/@-symbols/@-codebase) - Reference your entire codebase as context ([Chat](/chat/overview) only)
* [@Lint Errors](/context/@-symbols/@-lint-errors) - Reference lint errors ([Chat](/chat/overview) only)
* [@Definitions](/context/@-symbols/@-definitions) - Look up symbol definitions ([Cmd K](/cmdk/overview) only)
There are also some other symbols that can be used:
* [# Files](/context/@-symbols/pill-files) - Add files to the context without referencing
* [/ Commands](/context/@-symbols/slash-commands) - Add open and active files to the context
# #Files
Source: https://docs.cursor.com/context/@-symbols/pill-files
Use # to select files and @ for context control when chatting with AI agents
Use `#` followed by a filename to focus on specific files. Combine this with `@` symbols for precise context control.
With `@Web`, Cursor constructs a search query based on the query and the context you've provided, and searches the web to
find relevant information as additional context.
This can be useful to allow Cursor to find the most up-to-date information online, or to allow Cursor to scrape multiple websites in a few seconds to find the best answer, without the user having to manually search anywhere.
# Overview
Source: https://docs.cursor.com/context/@-symbols/overview
Overview of all @ symbols available in Cursor for context and commands
In Cursors input boxes, such as in Composer, Chat and Cmd K, you can use @ symbols by typing `@`. A popup menu will appear with a list of suggestions,
and it will automatically filter to only show the most relevant suggestions based on your input.
## Keyboard Shortcuts
You can navigate through the list of suggestions using the up/down arrow keys. You can hit `Enter` to select a suggestion. If the suggestion is a category, such as `Files`,
the suggestions will be filtered to only show the most relevant items within that category.
Here's the list of all @ symbols available:
* [@Files](/context/@-symbols/@-files) - Reference specific files in your project
* [@Folders](/context/@-symbols/@-folders) - Reference entire folders for broader context
* [@Code](/context/@-symbols/@-code) - Reference specific code snippets or symbols from your codebase
* [@Docs](/context/@-symbols/@-docs) - Access documentation and guides
* [@Git](/context/@-symbols/@-git) - Access git history and changes
* [@Notepads](/context/@-symbols/@-notepads) - Access notepads
* [@Summarized Composers](/context/@-symbols/@-summarized-composers) - Work with summarized composer sessions
* [@Cursor Rules](/context/@-symbols/@-cursor-rules) - Work with cursor rules
* [@Web](/context/@-symbols/@-web) - Reference external web resources and documentation
* [@Link (paste)](/context/@-symbols/@-link) - Create links to specific code or documentation
* [@Recent Changes](/context/@-symbols/@-recent-changes) - Create links to specific code or documentation
* [@Codebase](/context/@-symbols/@-codebase) - Reference your entire codebase as context ([Chat](/chat/overview) only)
* [@Lint Errors](/context/@-symbols/@-lint-errors) - Reference lint errors ([Chat](/chat/overview) only)
* [@Definitions](/context/@-symbols/@-definitions) - Look up symbol definitions ([Cmd K](/cmdk/overview) only)
There are also some other symbols that can be used:
* [# Files](/context/@-symbols/pill-files) - Add files to the context without referencing
* [/ Commands](/context/@-symbols/slash-commands) - Add open and active files to the context
# #Files
Source: https://docs.cursor.com/context/@-symbols/pill-files
Use # to select files and @ for context control when chatting with AI agents
Use `#` followed by a filename to focus on specific files. Combine this with `@` symbols for precise context control.
 # /command
Source: https://docs.cursor.com/context/@-symbols/slash-commands
Use / to reference open editor tabs and add them as context when composing chats with the AI agent
You type `/`to quickly reference open editors and add them as context
# /command
Source: https://docs.cursor.com/context/@-symbols/slash-commands
Use / to reference open editor tabs and add them as context when composing chats with the AI agent
You type `/`to quickly reference open editors and add them as context
 * **Open editors**: All editors tabs currently open
* **Active editors**: All editor tabs in view. This is typically when splitting the layout to show multiple editors
# Codebase Indexing
Source: https://docs.cursor.com/context/codebase-indexing
Learn how to index your codebase in Cursor for more accurate AI assistance and search results
### Index your Codebase
For better and more accurate codebase answers, you can index your codebase. Behind the scenes, Cursor
computes embeddings for each file in your codebase, and will use these to improve the accuracy of your codebase answers.
Cursor maintains separate codebase indexes for each user. After you complete the initial indexing setup, Cursor will automatically index any new files added to your workspace to keep your personal codebase context current.
The status of your codebase indexing is under `Cursor Settings` > `Features` > `Codebase Indexing`.
* **Open editors**: All editors tabs currently open
* **Active editors**: All editor tabs in view. This is typically when splitting the layout to show multiple editors
# Codebase Indexing
Source: https://docs.cursor.com/context/codebase-indexing
Learn how to index your codebase in Cursor for more accurate AI assistance and search results
### Index your Codebase
For better and more accurate codebase answers, you can index your codebase. Behind the scenes, Cursor
computes embeddings for each file in your codebase, and will use these to improve the accuracy of your codebase answers.
Cursor maintains separate codebase indexes for each user. After you complete the initial indexing setup, Cursor will automatically index any new files added to your workspace to keep your personal codebase context current.
The status of your codebase indexing is under `Cursor Settings` > `Features` > `Codebase Indexing`.
 ### Advanced Settings
By default, Cursor will index all files in your codebase.
You can also expand the `Show Settings` section to access more advanced options.
Here, you can decide whether you want to enable automatic indexing for new repositories and configure the files
that Cursor will ignore during repository indexing.
Cursor uses the same package as VS Code to handle file ignoring, which means it respects all `.gitignore` files, including those in subdirectories. You can also create a `.cursorignore` file for user-specific ignore patterns, which you may want to add to your global `.gitignore` to avoid committing it to the repository.
If you have any large content files in your project that the AI definitely doesn't need to read, [ignoring those files](/context/ignore-files) could improve the accuracy of the answers.
### Working with large monorepos
When working with large monorepos containing hundreds of thousands of files, it's important to be strategic about what gets indexed.
* Use `.cursorignore` to let each developer configure which folders and paths they work on in the monorepo
* Add `.cursorignore` to your global `.gitignore`
This allows each developer to optimize indexing for their specific work areas within the monorepo.
## FAQ
### Where can I see all codebases I have indexed?
Currently, there is no way to see a list of all codebases you have indexed. You'll need to manually check each project's indexing status by opening the project in Cursor and checking the Codebase Indexing settings.
### How do I delete all codebases?
You can either delete your Cursor account from Settings to remove all indexed codebases, or manually delete individual codebases from the Codebase Indexing settings in each project. There's currently no way to delete all codebases at once without deleting your account.
# Ignore Files
Source: https://docs.cursor.com/context/ignore-files
Learn how to use .cursorignore to exclude files from codebase indexing, similar to .gitignore
## About `.cursorignore`
To ignore files from being included in [codebase indexing](/context/codebase-indexing), you
can use a `.cursorignore` file in the root of your project. It works the same way as `.gitignore` works for git.
`.cursorignore` respects `.gitignore`. If you already have `.gitignore`, the files will be ignored by default.
If you want to ignore additional files, you can add them to the `.cursorignore` file.
You can read more about how this works on our [security page](https://www.cursor.com/security).
## Chat and Composer Context
Currently, Chat and Composer have access to all files in their context, regardless of `.cursorignore` settings.
More info on how we handle AI requests can be found on our [security page](https://www.cursor.com/security#ai-requests).
## Example `.cursorignore` files
### Ignore specific files
```sh
# Ignore all files in the `dist` directory
dist/
# Ignore all `.log` files
*.log
# Ignore specific file `config.json`
config.json
```
### Only include specific files
Include only `*.py` files in the `app` directory. Note that this is the same syntax as `.gitignore`.
```sh
# ignore everything
*
# do not ignore app
!app/
# do not ignore directories inside app
!app/*/
!app/**/*/
# don't ignore python files
!*.py
```
## Troubleshooting
The ignore file syntax is sometimes a bit confusing. The `.cursorignore` file follows the exact same syntax as `.gitignore`, so if you are trying an ignore file and it doesn't work the way you expect it to, we recommend a Google search for the issue, replacing `cursorignore` in your search query with `gitignore`. Probably someone will had the same issue and StackOverflow will have a good answer.
One common example: [here's how you ignore all files except those with a `.php` extension](https://stackoverflow.com/a/50606028) (just adding `*` followed by `!*.php` does not work because the gitignore file discoverer will not descend into and discover any `.php` files in subdirectories).
# Model Context Protocol
Source: https://docs.cursor.com/context/model-context-protocol
Learn how to add and use custom MCP tools with the Agent in Cursor's Composer feature
The [Model Context Protocol (MCP)](https://modelcontextprotocol.io/introduction) is an open protocol that allows you to provide custom tools to agentic LLMs in Cursor.
### Advanced Settings
By default, Cursor will index all files in your codebase.
You can also expand the `Show Settings` section to access more advanced options.
Here, you can decide whether you want to enable automatic indexing for new repositories and configure the files
that Cursor will ignore during repository indexing.
Cursor uses the same package as VS Code to handle file ignoring, which means it respects all `.gitignore` files, including those in subdirectories. You can also create a `.cursorignore` file for user-specific ignore patterns, which you may want to add to your global `.gitignore` to avoid committing it to the repository.
If you have any large content files in your project that the AI definitely doesn't need to read, [ignoring those files](/context/ignore-files) could improve the accuracy of the answers.
### Working with large monorepos
When working with large monorepos containing hundreds of thousands of files, it's important to be strategic about what gets indexed.
* Use `.cursorignore` to let each developer configure which folders and paths they work on in the monorepo
* Add `.cursorignore` to your global `.gitignore`
This allows each developer to optimize indexing for their specific work areas within the monorepo.
## FAQ
### Where can I see all codebases I have indexed?
Currently, there is no way to see a list of all codebases you have indexed. You'll need to manually check each project's indexing status by opening the project in Cursor and checking the Codebase Indexing settings.
### How do I delete all codebases?
You can either delete your Cursor account from Settings to remove all indexed codebases, or manually delete individual codebases from the Codebase Indexing settings in each project. There's currently no way to delete all codebases at once without deleting your account.
# Ignore Files
Source: https://docs.cursor.com/context/ignore-files
Learn how to use .cursorignore to exclude files from codebase indexing, similar to .gitignore
## About `.cursorignore`
To ignore files from being included in [codebase indexing](/context/codebase-indexing), you
can use a `.cursorignore` file in the root of your project. It works the same way as `.gitignore` works for git.
`.cursorignore` respects `.gitignore`. If you already have `.gitignore`, the files will be ignored by default.
If you want to ignore additional files, you can add them to the `.cursorignore` file.
You can read more about how this works on our [security page](https://www.cursor.com/security).
## Chat and Composer Context
Currently, Chat and Composer have access to all files in their context, regardless of `.cursorignore` settings.
More info on how we handle AI requests can be found on our [security page](https://www.cursor.com/security#ai-requests).
## Example `.cursorignore` files
### Ignore specific files
```sh
# Ignore all files in the `dist` directory
dist/
# Ignore all `.log` files
*.log
# Ignore specific file `config.json`
config.json
```
### Only include specific files
Include only `*.py` files in the `app` directory. Note that this is the same syntax as `.gitignore`.
```sh
# ignore everything
*
# do not ignore app
!app/
# do not ignore directories inside app
!app/*/
!app/**/*/
# don't ignore python files
!*.py
```
## Troubleshooting
The ignore file syntax is sometimes a bit confusing. The `.cursorignore` file follows the exact same syntax as `.gitignore`, so if you are trying an ignore file and it doesn't work the way you expect it to, we recommend a Google search for the issue, replacing `cursorignore` in your search query with `gitignore`. Probably someone will had the same issue and StackOverflow will have a good answer.
One common example: [here's how you ignore all files except those with a `.php` extension](https://stackoverflow.com/a/50606028) (just adding `*` followed by `!*.php` does not work because the gitignore file discoverer will not descend into and discover any `.php` files in subdirectories).
# Model Context Protocol
Source: https://docs.cursor.com/context/model-context-protocol
Learn how to add and use custom MCP tools with the Agent in Cursor's Composer feature
The [Model Context Protocol (MCP)](https://modelcontextprotocol.io/introduction) is an open protocol that allows you to provide custom tools to agentic LLMs in Cursor.
 And this is how you would configure the [MCP sample tool](https://github.com/modelcontextprotocol/python-sdk/tree/main/examples/servers/simple-tool), assuming it is running locally on port `8765`.

 ### Managing MCP servers
MCP servers can be edited or deleted from the MCP settings page.
## Using MCP Tools in Composer
The Composer Agent will **automatically** use any MCP tools that are listed under `Available Tools` on the MCP settings page if it determines them to be relevant.
To prompt tool usage intentionally, simply tell the agent to use the tool, referring to it either by name or by description.
When the agent decided to use a tool, it will display a message in the chat like the following, prompting the user to approve or deny the tool call.
### Managing MCP servers
MCP servers can be edited or deleted from the MCP settings page.
## Using MCP Tools in Composer
The Composer Agent will **automatically** use any MCP tools that are listed under `Available Tools` on the MCP settings page if it determines them to be relevant.
To prompt tool usage intentionally, simply tell the agent to use the tool, referring to it either by name or by description.
When the agent decided to use a tool, it will display a message in the chat like the following, prompting the user to approve or deny the tool call.
 The user can expand the message to see the tool call arguments.
If the user approves the tool call, the agent will use the tool and display the response in the chat.
This image shows the response from the sample tool, as well as expanded views of the tool call arguments and the tool call response.
The user can expand the message to see the tool call arguments.
If the user approves the tool call, the agent will use the tool and display the response in the chat.
This image shows the response from the sample tool, as well as expanded views of the tool call arguments and the tool call response.
 # Rules for AI
Source: https://docs.cursor.com/context/rules-for-ai
Learn how to customize AI behavior in Cursor using project-specific and global rules
Using rules in Cursor you can control the behavior of the underlying model. You can think of it as instructions and/or a system prompt for LLMs.
## Project Rules (recommended)
# Rules for AI
Source: https://docs.cursor.com/context/rules-for-ai
Learn how to customize AI behavior in Cursor using project-specific and global rules
Using rules in Cursor you can control the behavior of the underlying model. You can think of it as instructions and/or a system prompt for LLMs.
## Project Rules (recommended)
 Project rules offer a powerful and flexible system with path specific configurations. Project rules are stored in the `.cursor/rules` directory and provide granular control over AI behavior in different parts of your project.
Here's how they work
* **Semantic Descriptions**: Each rule can include a description of when it should be applied
* **File Pattern Matching**: Use glob patterns to specify which files/folders the rule applies to
* **Automatic Attachment**: Rules can be automatically included when matching files are referenced
* **Reference files**: Use @file in your project rules to include them as context when the rule is applied.
Project rules offer a powerful and flexible system with path specific configurations. Project rules are stored in the `.cursor/rules` directory and provide granular control over AI behavior in different parts of your project.
Here's how they work
* **Semantic Descriptions**: Each rule can include a description of when it should be applied
* **File Pattern Matching**: Use glob patterns to specify which files/folders the rule applies to
* **Automatic Attachment**: Rules can be automatically included when matching files are referenced
* **Reference files**: Use @file in your project rules to include them as context when the rule is applied.
 ## `.cursorrules`
For backward compatibility, you can still use a `.cursorrules` file in the root of your project. We will eventually remove .cursorrules in the future, so we recommend migrating to the new Project Rules system for better flexibility and control.
# FAQ
Source: https://docs.cursor.com/faq
Frequently asked questions about Cursor's features, language support, models, and usage
## `.cursorrules`
For backward compatibility, you can still use a `.cursorrules` file in the root of your project. We will eventually remove .cursorrules in the future, so we recommend migrating to the new Project Rules system for better flexibility and control.
# FAQ
Source: https://docs.cursor.com/faq
Frequently asked questions about Cursor's features, language support, models, and usage
 ## Staying Up to Date
We periodically rebase Cursor onto the latest version of VS Code.
## Why Not an Extension?
As a standalone application, Cursor has more control over the UI of the editor, enabling greater AI integration. Some of our features, like Cursor Tab and CMD-K, are not possible as plugins to existing coding environments.
## Settings
You can open Cursor specific settings pane by clicking on the gear button top-right, by pressing `Ctrl/⌘ + Shift + J`, or with `Ctrl/⌘ + Shift + P` and typing `Cursor Settings`.
You can open VS Code specific settings with `Ctrl/⌘ + Shift + P`, and then typing `VS Code Settings`.
## Why is the Activity Bar in Cursor horizontal?
## Staying Up to Date
We periodically rebase Cursor onto the latest version of VS Code.
## Why Not an Extension?
As a standalone application, Cursor has more control over the UI of the editor, enabling greater AI integration. Some of our features, like Cursor Tab and CMD-K, are not possible as plugins to existing coding environments.
## Settings
You can open Cursor specific settings pane by clicking on the gear button top-right, by pressing `Ctrl/⌘ + Shift + J`, or with `Ctrl/⌘ + Shift + P` and typing `Cursor Settings`.
You can open VS Code specific settings with `Ctrl/⌘ + Shift + P`, and then typing `VS Code Settings`.
## Why is the Activity Bar in Cursor horizontal?
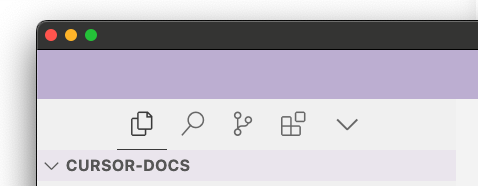 The activity bar is horizontal by default to save room for chat. If you prefer the normal vertical activity bar you can go to the VS Code settings and set `workbench.activityBar.orientation` to `vertical`, and restart Cursor.
# Welcome to Cursor
Source: https://docs.cursor.com/get-started/welcome
AI-powered IDE with Chat, Tab, and Agent for intelligent code development
Cursor is a new, intelligent IDE, empowered by seamless integrations with AI.
Built upon VSCode, Cursor is quick to learn, but can make you extraordinarily productive.
## Get started
If you're new to Cursor, you can get started using the guides below.
The activity bar is horizontal by default to save room for chat. If you prefer the normal vertical activity bar you can go to the VS Code settings and set `workbench.activityBar.orientation` to `vertical`, and restart Cursor.
# Welcome to Cursor
Source: https://docs.cursor.com/get-started/welcome
AI-powered IDE with Chat, Tab, and Agent for intelligent code development
Cursor is a new, intelligent IDE, empowered by seamless integrations with AI.
Built upon VSCode, Cursor is quick to learn, but can make you extraordinarily productive.
## Get started
If you're new to Cursor, you can get started using the guides below.
 1. Stage the files you want to commit
2. Open the Git tab in the sidebar
3. Look for the sparkle (✨) icon next to the commit message input field
4. Click the sparkle icon to generate a commit message based on your staged changes
The generated commit message will be based on the changes in your staged files and your repository's git history. This means Cursor will analyze both your current changes and previous commit messages to generate a contextually appropriate message. Cursor learns from your commit history, which means if you use conventions like [Conventional Commits](https://www.conventionalcommits.org/), the generated messages will follow the same pattern.
## Shortcut
You can bind the generate commit message feature to a keyboard shortcut.
1. Go to Keyboard Shortcuts `⌘R ⌘S` or `⌘⇧P` and search for "Open Keyboard Shortcuts (JSON)"
2. Add the following to the file to bind to `⌘M`:
```json
{
"key": "cmd+m",
"command": "cursor.generateGitCommitMessage"
}
```
3. Save the file and you're done!
1. Stage the files you want to commit
2. Open the Git tab in the sidebar
3. Look for the sparkle (✨) icon next to the commit message input field
4. Click the sparkle icon to generate a commit message based on your staged changes
The generated commit message will be based on the changes in your staged files and your repository's git history. This means Cursor will analyze both your current changes and previous commit messages to generate a contextually appropriate message. Cursor learns from your commit history, which means if you use conventions like [Conventional Commits](https://www.conventionalcommits.org/), the generated messages will follow the same pattern.
## Shortcut
You can bind the generate commit message feature to a keyboard shortcut.
1. Go to Keyboard Shortcuts `⌘R ⌘S` or `⌘⇧P` and search for "Open Keyboard Shortcuts (JSON)"
2. Add the following to the file to bind to `⌘M`:
```json
{
"key": "cmd+m",
"command": "cursor.generateGitCommitMessage"
}
```
3. Save the file and you're done!
 ## Anthropic API Keys
Similar to OpenAI, you can also set your own Anthropic API key so that you will be using claude-based models at your own cost.
## Anthropic API Keys
Similar to OpenAI, you can also set your own Anthropic API key so that you will be using claude-based models at your own cost.
 ## Google API Keys
For Google API keys, you can set your own API key so that you will be using Google models such as `gemini-1.5-flash-500k` at your own cost.
## Google API Keys
For Google API keys, you can set your own API key so that you will be using Google models such as `gemini-1.5-flash-500k` at your own cost.
 ## Azure Integration
Finally, you can also set your own Azure API key so that you will be using Azure OpenAI models at your own cost.
## Azure Integration
Finally, you can also set your own Azure API key so that you will be using Azure OpenAI models at your own cost.
 ## FAQ
### Will my API key be stored or leave my device?
Your API key will not be stored, but it will be sent up to our server with every request. All requests are routed through our backend where we do the final prompt building.
### What custom LLM providers are supported?
Cursor only supports API providers that are compatible with the OpenAI API format (like OpenRouter). We do not provide support for custom local LLM setups or other API formats. If you're having issues with a custom API setup that isn't from our supported providers, we unfortunately cannot provide technical support.
# Models
Source: https://docs.cursor.com/settings/models
Switch between AI models in Cursor using Chat, Composer, Tab, or Agent with different pricing tiers
With Composer, ⌘ K, and Terminal Ctrl/⌘ K, you can easily switch between different models of your choice.
## Available models
## FAQ
### Will my API key be stored or leave my device?
Your API key will not be stored, but it will be sent up to our server with every request. All requests are routed through our backend where we do the final prompt building.
### What custom LLM providers are supported?
Cursor only supports API providers that are compatible with the OpenAI API format (like OpenRouter). We do not provide support for custom local LLM setups or other API formats. If you're having issues with a custom API setup that isn't from our supported providers, we unfortunately cannot provide technical support.
# Models
Source: https://docs.cursor.com/settings/models
Switch between AI models in Cursor using Chat, Composer, Tab, or Agent with different pricing tiers
With Composer, ⌘ K, and Terminal Ctrl/⌘ K, you can easily switch between different models of your choice.
## Available models
 Underneath the AI input box, you will see a dropdown that allows you to select the model you want to use. The following models are available:
## Context windows
In Chat and Composer, we use a 40,000 token context window by default. For Cmd-K, we limit to around 10,000 tokens to balance TTFT and quality. Agent starts at 60,000 tokens and supports up to 120,000 tokens. For longer conversations, we automatically summarize the context to preserve token space. Note that these threshold are changed from time to time to optimize the experience.
# Preferences
Source: https://docs.cursor.com/settings/preferences
Learn how to customize Chat, Composer, Terminal, and Editor features in Cursor's settings menu
You can set preferences for certain features from Cursor Settings
Underneath the AI input box, you will see a dropdown that allows you to select the model you want to use. The following models are available:
## Context windows
In Chat and Composer, we use a 40,000 token context window by default. For Cmd-K, we limit to around 10,000 tokens to balance TTFT and quality. Agent starts at 60,000 tokens and supports up to 120,000 tokens. For longer conversations, we automatically summarize the context to preserve token space. Note that these threshold are changed from time to time to optimize the experience.
# Preferences
Source: https://docs.cursor.com/settings/preferences
Learn how to customize Chat, Composer, Terminal, and Editor features in Cursor's settings menu
You can set preferences for certain features from Cursor Settings
 ### Terminal
#### Show Terminal Hover Hint
If enabled, shows a hover hint in the terminal with the command to 'Add to Chat' or 'Debug with AI'.
# Advanced Features
Source: https://docs.cursor.com/tab/advanced-features
Learn to navigate code efficiently using Tab in peek views, prediction, and partial accepts
## Tab in Peek
You can also use Cursor Tab in the "Go to Definition" or "Go to Type Definition" peek views. This is useful, for example, when adding a new argument to a function call.
### Terminal
#### Show Terminal Hover Hint
If enabled, shows a hover hint in the terminal with the command to 'Add to Chat' or 'Debug with AI'.
# Advanced Features
Source: https://docs.cursor.com/tab/advanced-features
Learn to navigate code efficiently using Tab in peek views, prediction, and partial accepts
## Tab in Peek
You can also use Cursor Tab in the "Go to Definition" or "Go to Type Definition" peek views. This is useful, for example, when adding a new argument to a function call.
 We especially enjoy using this in vim in conjunction with `gd` to, for example, modify a function definition, then fix all of its usages in one go.
##
We especially enjoy using this in vim in conjunction with `gd` to, for example, modify a function definition, then fix all of its usages in one go.
##  ##
##  * Instruction-based edits
 Further, Cursor has a history of your recent changes in the context window, so it knows what you are trying to do next.
## Migrate from GitHub Copilot
Since Cursor comes by default with GitHub Copilot, you might have GitHub Copilot and Cursor installed at the same time. We recommend turning off GitHub Copilot when you want to use Cursor.
By default, Cursor takes precedence over GitHub Copilot. If you want to use GitHub Copilot, you can [disable Cursor](/tab/overview#copilot-settings) in the settings.
# Overview
Source: https://docs.cursor.com/tab/overview
AI-powered code autocomplete that suggests edits and multi-line changes based on your recent work
Cursor Tab is our native autocomplete feature. It's a more powerful Copilot that suggests entire diffs with especially good memory.
Powered by a custom model, Cursor Tab can:
* Suggest edits around your cursor, not just insertions of additional code.
* Modify multiple lines at once.
* Make suggestions based on your recent changes and linter errors.
Free users receive 2000 suggestions at no cost. Pro and Business plans receive unlimited suggestions.
## UI
When Cursor is only adding additional text, completions will appear as grey text. If a suggestion modifies existing code,
it will appear as a diff popup to the right of your current line.
Further, Cursor has a history of your recent changes in the context window, so it knows what you are trying to do next.
## Migrate from GitHub Copilot
Since Cursor comes by default with GitHub Copilot, you might have GitHub Copilot and Cursor installed at the same time. We recommend turning off GitHub Copilot when you want to use Cursor.
By default, Cursor takes precedence over GitHub Copilot. If you want to use GitHub Copilot, you can [disable Cursor](/tab/overview#copilot-settings) in the settings.
# Overview
Source: https://docs.cursor.com/tab/overview
AI-powered code autocomplete that suggests edits and multi-line changes based on your recent work
Cursor Tab is our native autocomplete feature. It's a more powerful Copilot that suggests entire diffs with especially good memory.
Powered by a custom model, Cursor Tab can:
* Suggest edits around your cursor, not just insertions of additional code.
* Modify multiple lines at once.
* Make suggestions based on your recent changes and linter errors.
Free users receive 2000 suggestions at no cost. Pro and Business plans receive unlimited suggestions.
## UI
When Cursor is only adding additional text, completions will appear as grey text. If a suggestion modifies existing code,
it will appear as a diff popup to the right of your current line.

 You can accept a suggestion by pressing `Tab`, or reject it by pressing `Esc`. To partially accept a suggestion word-by-word, press `Ctrl/⌘ →`.
To reject a suggestion, just keep typing, or use `Escape` to cancel/hide the suggestion.
Every keystroke or cursor movement, Cursor will attempt to make a suggestion based on your recent changes. However, Cursor will not always show a suggestion; sometimes the model has predicted that there's no change to be made.
Cursor can make changes from one line above to two lines below your current line.
## Toggling
To turn the feature on or off, hover over "Cursor Tab" icon on the status bar in the bottom right of the application.
## FAQ
### Tab gets in the way when writing comments, what can I do?
You can disable Cursor Tab for comments by going to `Cursor Settings` > `Tab Completion` and unchecking "Trigger in comments".
# Common Issues
Source: https://docs.cursor.com/troubleshooting/common-issues
Guide for troubleshooting common Cursor app issues including updates, login, and connectivity problems
## Network Issues
If you're experiencing connectivity issues with Cursor, here are some steps to troubleshoot:
Common symptoms of network issues include:
* Codebase indexing failing with errors
* Agent showing connection errors
* Tab autocomplete not working
* Chat or other AI features failing to respond
Here are the steps to troubleshoot:
1. Check your internet connection
2. Verify if you're behind a corporate proxy or VPN
3. Test if HTTP/2 is accessible by running:
```bash
curl -I --http2 -v https://api2.cursor.sh
```
If you see the following response, it indicates HTTP/2 is not properly negotiated:
```
* ALPN: server did not agree on a protocol. Uses default.
* using HTTP/1.x
```
#### ZScaler
If you're using ZScaler and experiencing connectivity issues, here are your options:
1. Configure the ZScaler proxy to properly support HTTP/2 ALPN negotiation
2. Allowlist the cursor.sh domain to bypass the ZScaler inspection
The following domains need to be accessible:
* `api2.cursor.sh`: Used for most API requests
* `api3.cursor.sh`: Used for Cursor Tab requests (HTTP/2 only)
* `repo42.cursor.sh`: Used for codebase indexing (HTTP/2 only)
* `api4.cursor.sh`, `us-asia.gcpp.cursor.sh`, `us-eu.gcpp.cursor.sh`, `us-only.gcpp.cursor.sh`: Used for Cursor Tab requests depending on your location (HTTP/2 only)
* `marketplace.cursorapi.com`, `cursor-cdn.com`: Used for downloading extensions from the extension marketplace
* `download.todesktop.com`: Used for checking for and downloading updates
To verify if ZScaler is causing the issue, try temporarily disconnecting from ZScaler and test if Cursor's functionality is restored.
## Resource Usage Issues
If you're experiencing high CPU or RAM usage in Cursor, here are steps to diagnose and resolve the issue:
1. Check enabled extensions
* Some extensions can significantly impact performance
* Disable extensions one by one to identify problematic ones
* Consider removing unused extensions
2. Use Process Explorer
* Open the Command Palette (`Cmd/Ctrl + Shift + P`)
* Type "Developer: Open Process Explorer"
* Monitor which processes are consuming resources
* Look for any processes using excessive CPU or memory
3. Monitor system resources
* Check if the issue is Cursor-specific or system-wide
* Consider closing other resource-intensive applications
* Ensure your system meets the minimum requirements
4. Test with minimal extensions
* Start Cursor with extensions disabled
* If performance improves, gradually re-enable extensions
* This helps identify which extensions may be causing issues
When reporting resource usage issues, screenshots of the Process Explorer and your system's resource monitor can be extremely helpful in diagnosing the problem.
## Other
#### I see an update on the changelog but Cursor won't update.
If the update is very new, it might not have rolled out to you yet. We do staged rollouts, which means we release new updates to a few randomly selected users first before releasing them to everyone. Expect to get the update in a couple days!
#### I have issues with my GitHub login in Cursor / How do I log out of GitHub in Cursor?
You can try using the `Sign Out of GitHub` command from the command palette `Ctrl/⌘ + Shift + P`.
#### I can't use GitHub Codespaces.
Unfortunately, we don't support GitHub Codespaces yet.
#### I have errors connecting to Remote SSH.
Currently, we don't support SSHing into Mac or Windows machines. If you're not using a Mac or Windows machine, please report your issue to us in the [forum](https://forum.cursor.com/). It would be helpful to include some logs for better assistance.
#### SSH Connection Problems on Windows
If you encounter the error "SSH is only supported in Microsoft versions of VS Code", follow these steps:
1. Uninstall the current Remote-SSH extension:
* Open the Extensions view (`Ctrl + Shift + X`)
* Search for "Remote-SSH"
* Click on the gear icon and select "Uninstall"
2. Install version 0.113 of Remote-SSH:
* Go to the Cursor marketplace
* Search for "Remote-SSH"
* Find version 0.113 and install it
3. After installation:
* Close all VS Code instances that have active SSH connections
* Restart Cursor completely
* Try connecting via SSH again
If you still experience issues, make sure your SSH configuration is correct and that you have the necessary SSH keys set up properly.
#### Cursor Tab and Cmd K do not work behind my corporate proxy.
Cursor Tab and Cmd K use HTTP/2 by default, which allows us to use less resources with lower latency. Some corporate proxies (e.g. Zscaler in certain configurations) block HTTP/2. To fix this, you can set `"cursor.general.disableHttp2": true` in the settings (`Cmd/Ctrl + ,` and then search for `http2`).
#### I just subscribed to Pro but I'm still on the free plan in the app.
Try logging out and logging back in from the Cursor Settings
#### When will my usage reset again?
If you're subscribed to Pro you can click on `Manage Subscription` from the [Dashboard](https://cursor.com/settings) and your plan renewal date will be displayed at the top.
If you're a free user you can check when you got the first email from us in your inbox. Your usage will reset every month from that date.
#### My Chat/Composer history disappeared after an update
If you notice that your Chat or Composer history has been cleared following an update, this is likely due to low disk space on your system. Cursor may need to clear historical data during updates when disk space is limited. To prevent this from happening:
1. Ensure you have sufficient free disk space before updating
2. Regularly clean up unnecessary files on your system
3. Consider backing up important conversations before updating
#### How do I uninstall Cursor?
You can follow [this guide](https://code.visualstudio.com/docs/setup/uninstall) to uninstall Cursor. Replace every occurrence of "VS Code" or "Code" with "Cursor", and ".vscode" with ".cursor".
#### How do I delete my account?
You can delete your account by clicking on the `Delete Account` button in the [Dashboard](https://cursor.com/settings). Note that this will delete your account and all data associated with it.
#### How do I open Cursor from the command line?
You can open Cursor from the command line by running `cursor` in your terminal. If you're missing the `cursor` command, you can
1. Open the command palette `⌘⇧P`
2. Type `install command`
3. Select `Install 'cursor' command` (and optionally the `code` command too which will override VS Code's `code` command)
#### Unable to Sign In to Cursor
If you click Sign In on the General tab of Cursor's Settings tab but are redirected to cursor.com and then return to Cursor still seeing the Sign In button, try disabling your firewall or antivirus software, which may be blocking the sign-in process.
# Getting a Request ID
Source: https://docs.cursor.com/troubleshooting/request-reporting
Learn how to find and share request IDs in Cursor for better technical support and issue reporting
When the Cursor team are investigating a technical issue, sometimes, we may ask you to provide us with a "request ID".
## What is a request ID?
A request ID is a unique identifier that is generated when you submit a request to Cursor. It is a string of characters that is used to identify the request in our internal systems.
It usually follows a randomized format, such as: `8f2a5b91-4d3e-47c6-9f12-5e8d94ca7d23`.
## How do I find a request ID?
You can accept a suggestion by pressing `Tab`, or reject it by pressing `Esc`. To partially accept a suggestion word-by-word, press `Ctrl/⌘ →`.
To reject a suggestion, just keep typing, or use `Escape` to cancel/hide the suggestion.
Every keystroke or cursor movement, Cursor will attempt to make a suggestion based on your recent changes. However, Cursor will not always show a suggestion; sometimes the model has predicted that there's no change to be made.
Cursor can make changes from one line above to two lines below your current line.
## Toggling
To turn the feature on or off, hover over "Cursor Tab" icon on the status bar in the bottom right of the application.
## FAQ
### Tab gets in the way when writing comments, what can I do?
You can disable Cursor Tab for comments by going to `Cursor Settings` > `Tab Completion` and unchecking "Trigger in comments".
# Common Issues
Source: https://docs.cursor.com/troubleshooting/common-issues
Guide for troubleshooting common Cursor app issues including updates, login, and connectivity problems
## Network Issues
If you're experiencing connectivity issues with Cursor, here are some steps to troubleshoot:
Common symptoms of network issues include:
* Codebase indexing failing with errors
* Agent showing connection errors
* Tab autocomplete not working
* Chat or other AI features failing to respond
Here are the steps to troubleshoot:
1. Check your internet connection
2. Verify if you're behind a corporate proxy or VPN
3. Test if HTTP/2 is accessible by running:
```bash
curl -I --http2 -v https://api2.cursor.sh
```
If you see the following response, it indicates HTTP/2 is not properly negotiated:
```
* ALPN: server did not agree on a protocol. Uses default.
* using HTTP/1.x
```
#### ZScaler
If you're using ZScaler and experiencing connectivity issues, here are your options:
1. Configure the ZScaler proxy to properly support HTTP/2 ALPN negotiation
2. Allowlist the cursor.sh domain to bypass the ZScaler inspection
The following domains need to be accessible:
* `api2.cursor.sh`: Used for most API requests
* `api3.cursor.sh`: Used for Cursor Tab requests (HTTP/2 only)
* `repo42.cursor.sh`: Used for codebase indexing (HTTP/2 only)
* `api4.cursor.sh`, `us-asia.gcpp.cursor.sh`, `us-eu.gcpp.cursor.sh`, `us-only.gcpp.cursor.sh`: Used for Cursor Tab requests depending on your location (HTTP/2 only)
* `marketplace.cursorapi.com`, `cursor-cdn.com`: Used for downloading extensions from the extension marketplace
* `download.todesktop.com`: Used for checking for and downloading updates
To verify if ZScaler is causing the issue, try temporarily disconnecting from ZScaler and test if Cursor's functionality is restored.
## Resource Usage Issues
If you're experiencing high CPU or RAM usage in Cursor, here are steps to diagnose and resolve the issue:
1. Check enabled extensions
* Some extensions can significantly impact performance
* Disable extensions one by one to identify problematic ones
* Consider removing unused extensions
2. Use Process Explorer
* Open the Command Palette (`Cmd/Ctrl + Shift + P`)
* Type "Developer: Open Process Explorer"
* Monitor which processes are consuming resources
* Look for any processes using excessive CPU or memory
3. Monitor system resources
* Check if the issue is Cursor-specific or system-wide
* Consider closing other resource-intensive applications
* Ensure your system meets the minimum requirements
4. Test with minimal extensions
* Start Cursor with extensions disabled
* If performance improves, gradually re-enable extensions
* This helps identify which extensions may be causing issues
When reporting resource usage issues, screenshots of the Process Explorer and your system's resource monitor can be extremely helpful in diagnosing the problem.
## Other
#### I see an update on the changelog but Cursor won't update.
If the update is very new, it might not have rolled out to you yet. We do staged rollouts, which means we release new updates to a few randomly selected users first before releasing them to everyone. Expect to get the update in a couple days!
#### I have issues with my GitHub login in Cursor / How do I log out of GitHub in Cursor?
You can try using the `Sign Out of GitHub` command from the command palette `Ctrl/⌘ + Shift + P`.
#### I can't use GitHub Codespaces.
Unfortunately, we don't support GitHub Codespaces yet.
#### I have errors connecting to Remote SSH.
Currently, we don't support SSHing into Mac or Windows machines. If you're not using a Mac or Windows machine, please report your issue to us in the [forum](https://forum.cursor.com/). It would be helpful to include some logs for better assistance.
#### SSH Connection Problems on Windows
If you encounter the error "SSH is only supported in Microsoft versions of VS Code", follow these steps:
1. Uninstall the current Remote-SSH extension:
* Open the Extensions view (`Ctrl + Shift + X`)
* Search for "Remote-SSH"
* Click on the gear icon and select "Uninstall"
2. Install version 0.113 of Remote-SSH:
* Go to the Cursor marketplace
* Search for "Remote-SSH"
* Find version 0.113 and install it
3. After installation:
* Close all VS Code instances that have active SSH connections
* Restart Cursor completely
* Try connecting via SSH again
If you still experience issues, make sure your SSH configuration is correct and that you have the necessary SSH keys set up properly.
#### Cursor Tab and Cmd K do not work behind my corporate proxy.
Cursor Tab and Cmd K use HTTP/2 by default, which allows us to use less resources with lower latency. Some corporate proxies (e.g. Zscaler in certain configurations) block HTTP/2. To fix this, you can set `"cursor.general.disableHttp2": true` in the settings (`Cmd/Ctrl + ,` and then search for `http2`).
#### I just subscribed to Pro but I'm still on the free plan in the app.
Try logging out and logging back in from the Cursor Settings
#### When will my usage reset again?
If you're subscribed to Pro you can click on `Manage Subscription` from the [Dashboard](https://cursor.com/settings) and your plan renewal date will be displayed at the top.
If you're a free user you can check when you got the first email from us in your inbox. Your usage will reset every month from that date.
#### My Chat/Composer history disappeared after an update
If you notice that your Chat or Composer history has been cleared following an update, this is likely due to low disk space on your system. Cursor may need to clear historical data during updates when disk space is limited. To prevent this from happening:
1. Ensure you have sufficient free disk space before updating
2. Regularly clean up unnecessary files on your system
3. Consider backing up important conversations before updating
#### How do I uninstall Cursor?
You can follow [this guide](https://code.visualstudio.com/docs/setup/uninstall) to uninstall Cursor. Replace every occurrence of "VS Code" or "Code" with "Cursor", and ".vscode" with ".cursor".
#### How do I delete my account?
You can delete your account by clicking on the `Delete Account` button in the [Dashboard](https://cursor.com/settings). Note that this will delete your account and all data associated with it.
#### How do I open Cursor from the command line?
You can open Cursor from the command line by running `cursor` in your terminal. If you're missing the `cursor` command, you can
1. Open the command palette `⌘⇧P`
2. Type `install command`
3. Select `Install 'cursor' command` (and optionally the `code` command too which will override VS Code's `code` command)
#### Unable to Sign In to Cursor
If you click Sign In on the General tab of Cursor's Settings tab but are redirected to cursor.com and then return to Cursor still seeing the Sign In button, try disabling your firewall or antivirus software, which may be blocking the sign-in process.
# Getting a Request ID
Source: https://docs.cursor.com/troubleshooting/request-reporting
Learn how to find and share request IDs in Cursor for better technical support and issue reporting
When the Cursor team are investigating a technical issue, sometimes, we may ask you to provide us with a "request ID".
## What is a request ID?
A request ID is a unique identifier that is generated when you submit a request to Cursor. It is a string of characters that is used to identify the request in our internal systems.
It usually follows a randomized format, such as: `8f2a5b91-4d3e-47c6-9f12-5e8d94ca7d23`.
## How do I find a request ID?