Roles
Members are the default role with access to Cursor’s Pro features.- Full access to Cursor’s Pro features
- No access to billing settings or admin dashboard
- Can see their own usage and remaining usage-based budget
- Full access to Pro features
- Add/remove members, modify roles, setup SSO
- Configure usage-based pricing and spending limits
- Access to team analytics
- Not billable, no Pro features
- Same administrative capabilities as Admins
Unpaid Admins require at least one paid user on the team.
Role Comparison
| Capability | Member | Admin | Unpaid Admin |
|---|---|---|---|
| Use Cursor features | ✓ | ✓ | |
| Invite members | ✓ | ✓ | ✓ |
| Remove members | ✓ | ✓ | |
| Change user role | ✓ | ✓ | |
| Admin dashboard | ✓ | ✓ | |
| Configure SSO/Security | ✓ | ✓ | |
| Manage Billing | ✓ | ✓ | |
| View Analytics | ✓ | ✓ | |
| Manage Access | ✓ | ✓ | |
| Set usage controls | ✓ | ✓ | |
| Requires paid seat | ✓ | ✓ |
Managing members
All team members can invite others. We don’t currently control invites.Add member
Add members three ways:-
Email invitation
- Click
Invite Members - Enter email addresses
- Users receive email invites
- Click
-
Invite link
- Click
Invite Members - Copy
Invite Link - Share with team members
- Click
-
SSO
- Configure SSO in admin dashboard
- Users auto-join when logging in via SSO email
Invite links have a long expiration date - anyone with the link can join.
Revoke them or use SSO
Remove member
Admins can remove members anytime via context menu → “Remove”. If a member has used any credits, their seat remains occupied until the end of the billing cycle.Change role
Admins can change roles for other members by clicking the context menu and then use the “Change role” option.There must be at least one Admin, and one paid member on the team at all times.
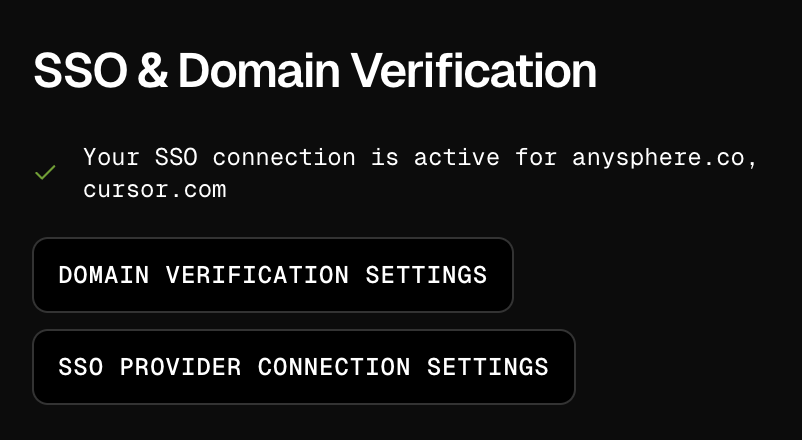
Security & SSO
SAML 2.0 Single Sign-On (SSO) is available on Team plans. Key features include:- Configure SSO connections (learn more)
- Set up domain verification
- Automatic user enrollment
- SSO enforcement options
- Identity provider integration (Okta, etc)
Domain verification is required to enable SSO.
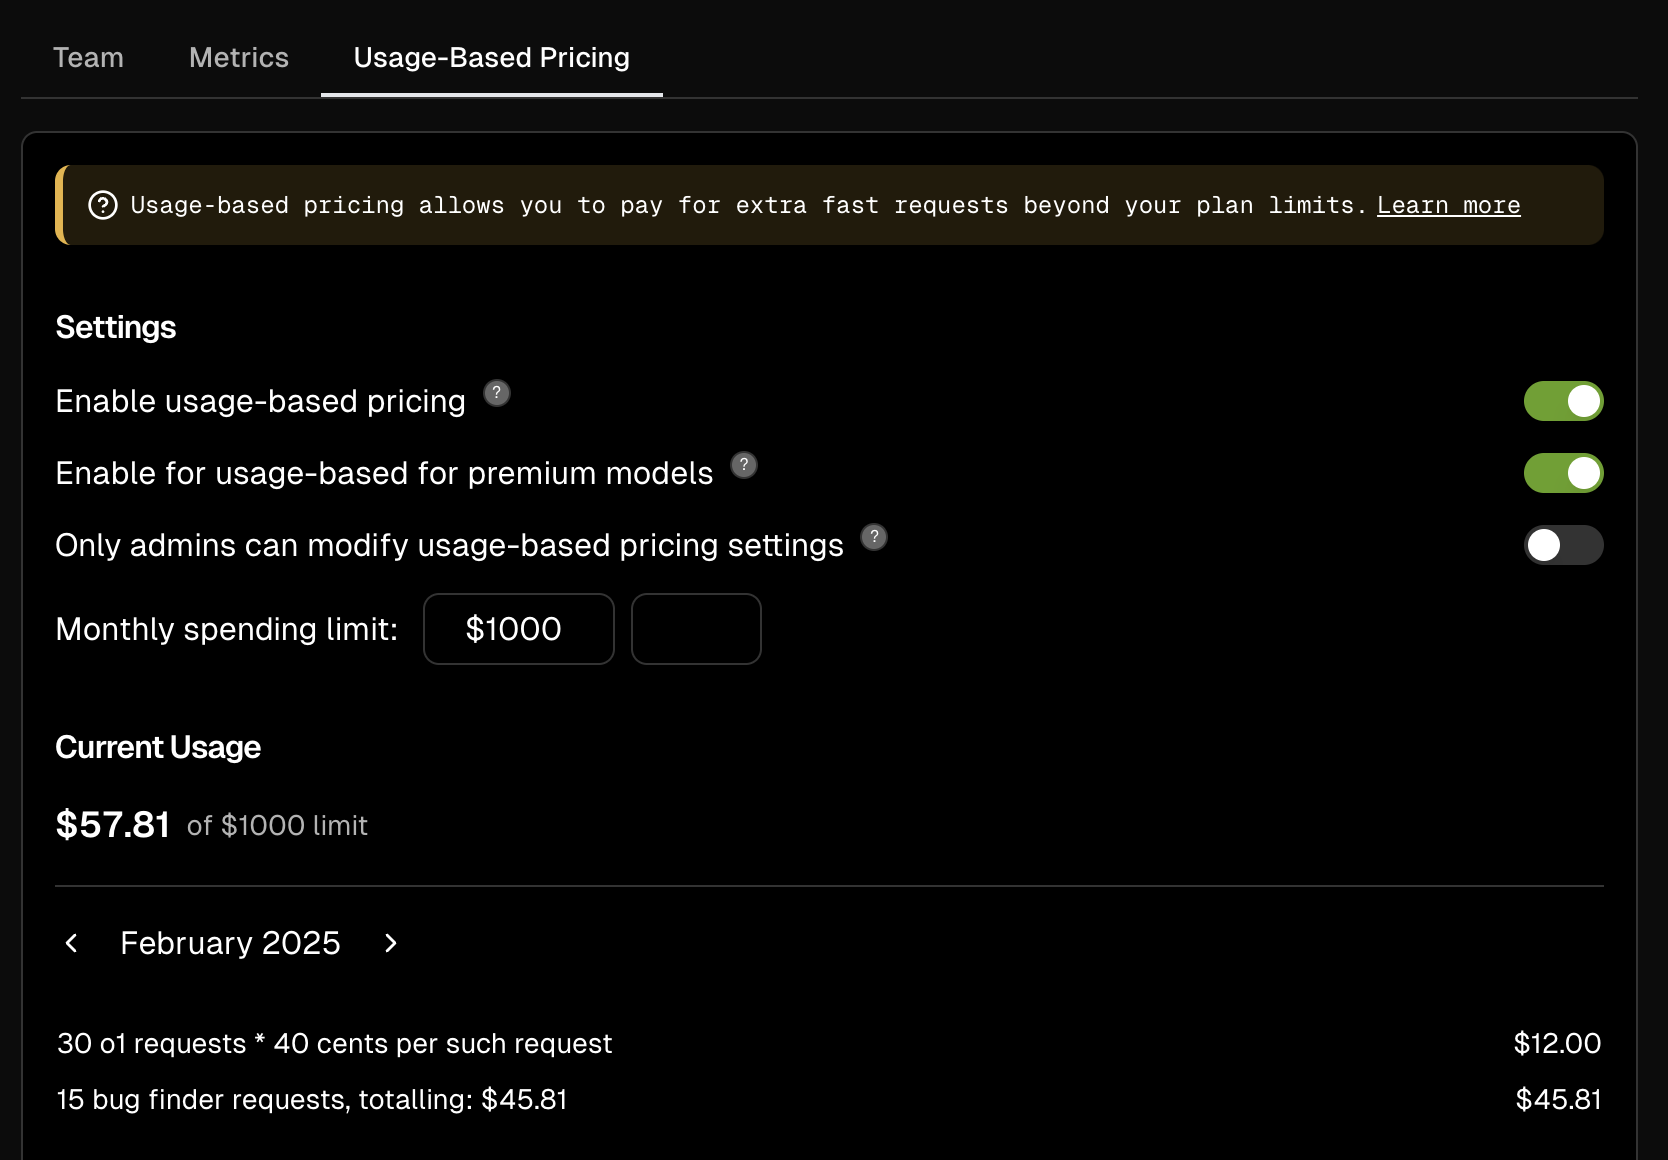
Usage Controls
Access usage settings to:- Enable usage-based pricing
- Enable for premium models
- Set admin-only modifications
- Set monthly spending limits
- Monitor team-wide usage
Billing
When adding team members:- Each member or admin adds a billable seat (see pricing)
- New members are charged pro-rata for their remaining time in the billing period
- Unpaid admin seats aren’t counted
Switch to Yearly billing
Save 20% by switching from monthly to yearly:- Go to Dashboard
- In account section, click “Advanced” then “Upgrade to yearly billing”
You can only switch from monthly to yearly via dashboard. To switch from
yearly to monthly, contact hi@cursor.com.