Introduction
MCP servers let you connect custom data sources and make them available for use inside Cursor. This is particularly useful when you need context from places such as browsers, databases, or error and system logs. Setting up an MCP server is straightforward, and with Cursor it can be done quickly. In this guide, we will walk through how to build an MCP server for Postgres. Our goal is to enable Cursor to run SQL queries directly against a Postgres database and to expose table schemas in a structured way.This tutorial is designed to teach the fundamentals of building MCP servers.
What is an MCP Server?
An MCP server is a process that communicates with Cursor and provides access to external data or actions. It can be implemented in several ways, but here we will use the simplest method: a server that runs locally on your computer over stdio (standard input/output streams). This avoids complicated security considerations and allows us to focus on the MCP logic itself. One of the most common use cases for MCP is database access. When building dashboards, running analyses, or creating migrations, it is often necessary to query and inspect a database. Our Postgres MCP server will support two core capabilities: running arbitrary queries and listing table schemas. Although both of these tasks could be performed with plain SQL, MCP offers features that make them more powerful and more generally useful. Tools provide a way to expose actions such as executing queries, while resources allow us to share standardized context such as schema information. Later in this guide we will also look at prompts, which enable more advanced workflows. Under the hood, we will rely on the postgres npm package to execute SQL statements against the database. The MCP SDK will serve as a wrapper around these calls, letting us integrate Postgres functionality seamlessly into Cursor.How to Build the MCP Server
The first step in building the server is to setup a new project. We’ll start with creating a new folder and initializing a Bun projectBlank project. Once our boilerplate is setup, we need to install the required dependencies. zod is required to define schemas for i/o in MCP sdk
postgres@modelcontextprotocol/sdk:
spec.md and write out the high level goals
Testing the MCP Server
Once the initial implementation is complete, we can test it using the MCP Inspector. The inspector provides a way to see what the server exposes and to verify that the tools and resources behave as expected. We should confirm that queries can be executed and that schema information is returned correctly.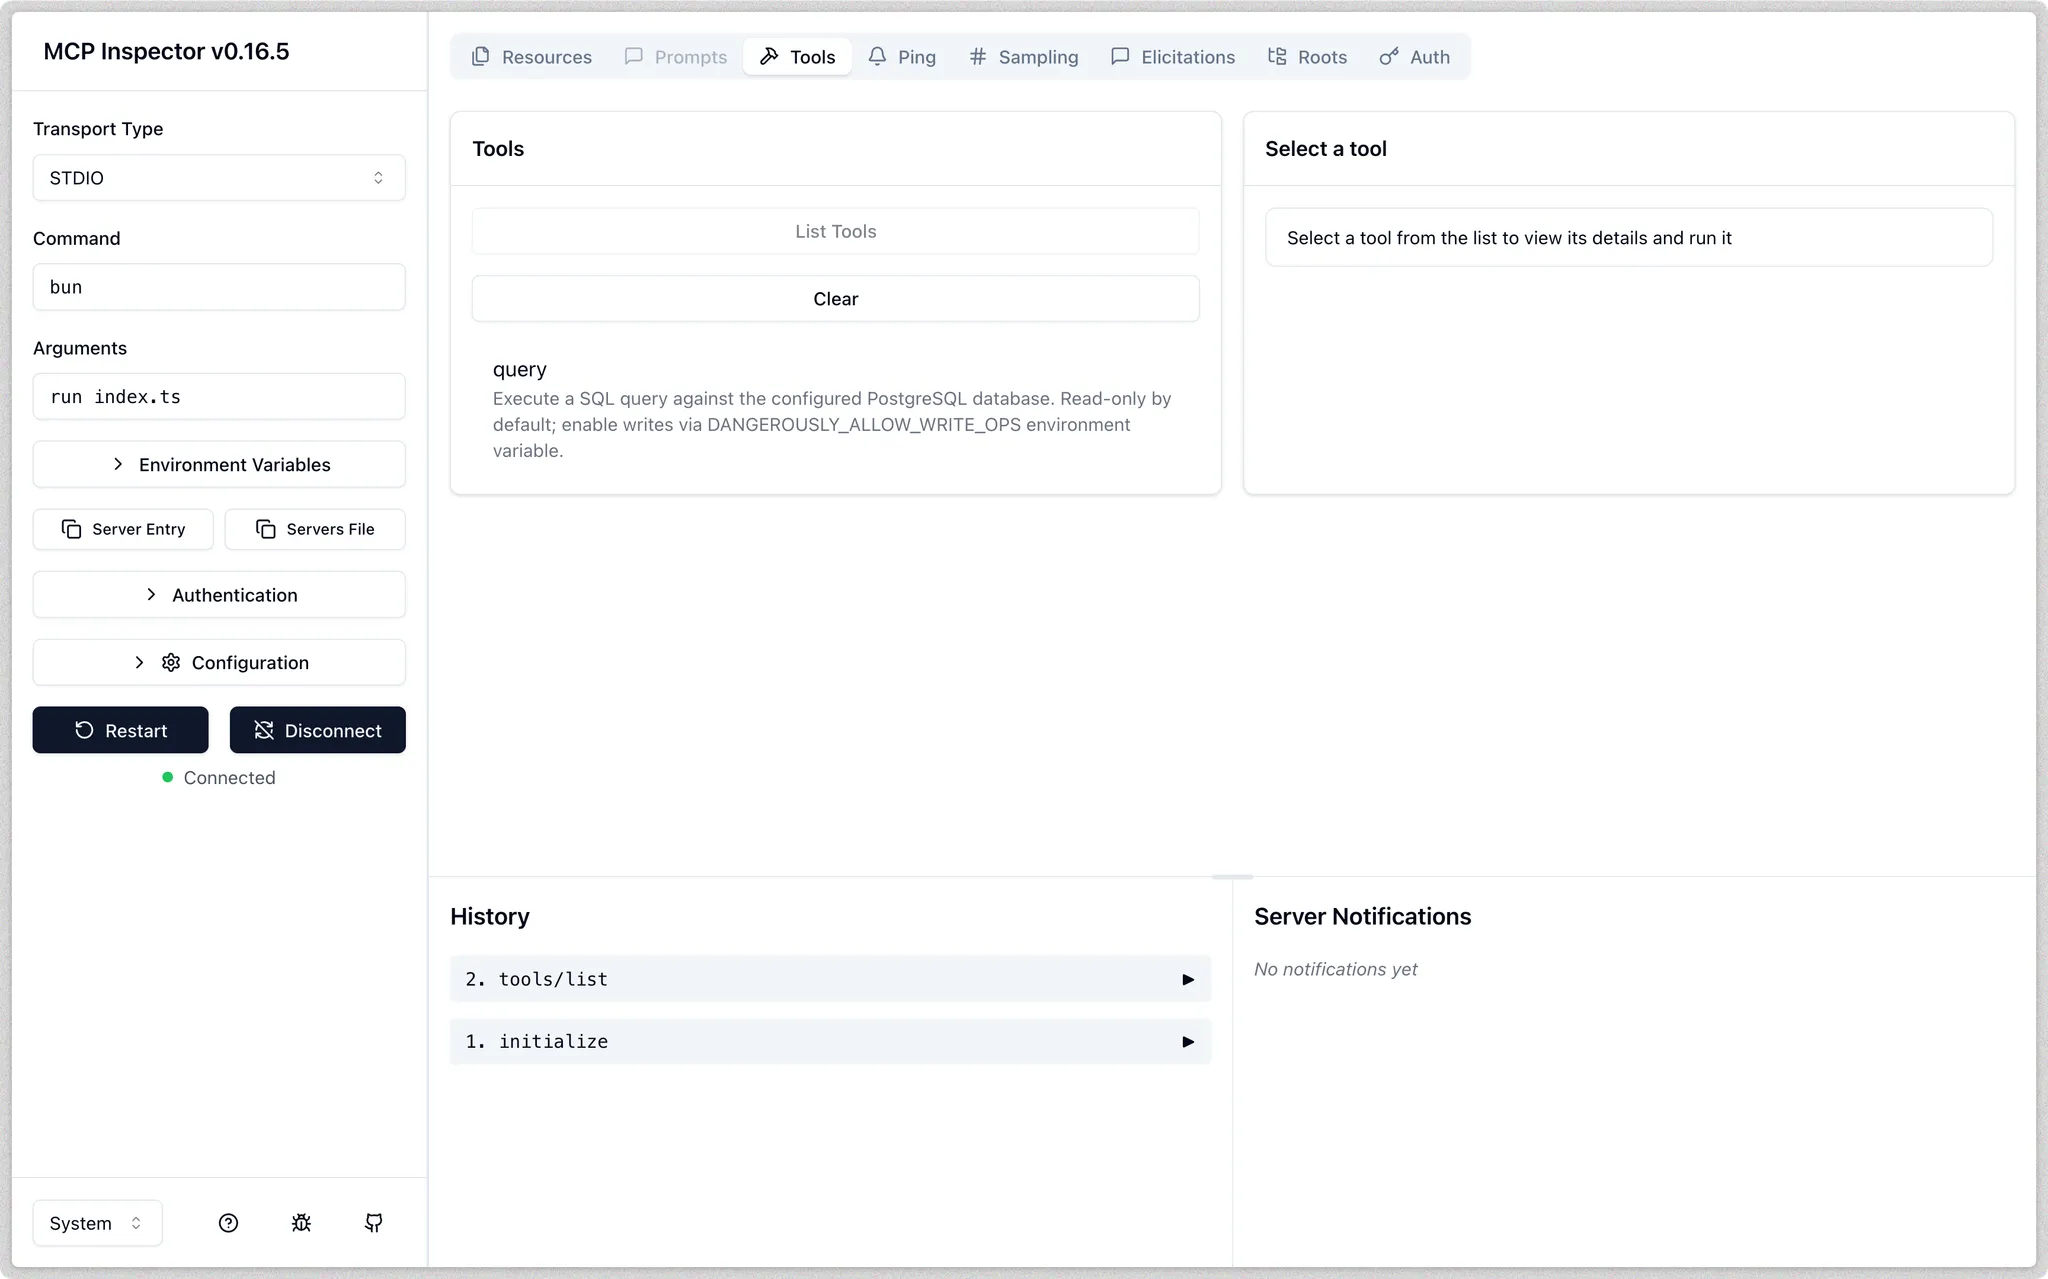
Next Steps
Running the MCP server locally over stdio is a great starting point, but teams often require shared access to the same database through their MCP server. In these scenarios, deploying the MCP server as a centralized HTTP service becomes necessary. A deployed MCP server offers several advantages over individual stdio instances:- Shared database access: Multiple team members can query the same database instance through Cursor
- Centralized configuration: Schema updates and permission changes are managed in one location
- Enhanced security: Proper authentication, rate limiting, and access controls can be implemented
- Observability: Usage patterns and performance metrics can be monitored across the team